
This tutorial is meant for those who do not have a lidar DEM to use in the IDW and Cross-Section REM tutorials. Shown here are the steps for locating and downloading lidar-derived DEMs from the USGS 3DEP Lidar Explorer, and steps for merging DEM datasets in QGIS.

Downloading and preparing the DEM
A. Go to the USGS 3DEP Lidar Explorer.
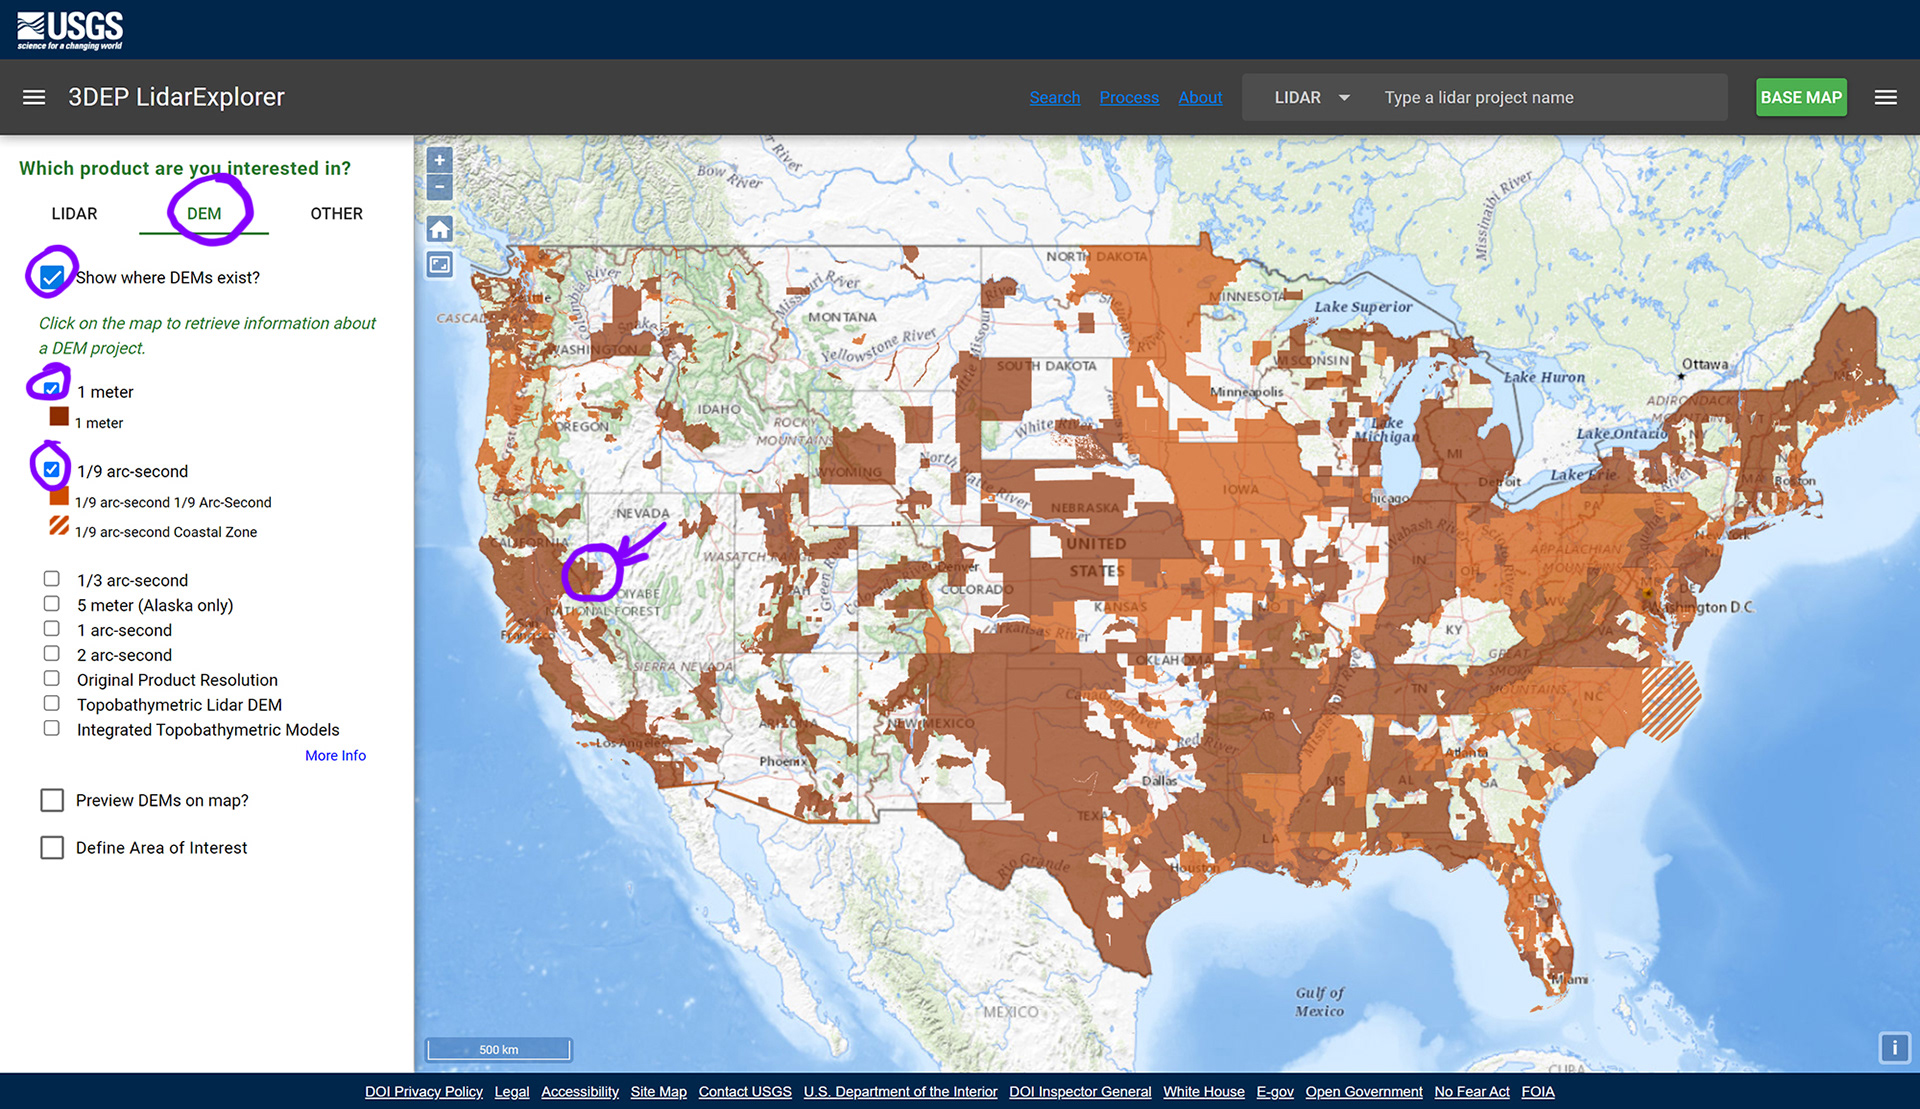
Once you are there, select "DEM" from the side menu on the left.
Then check Show where DEMs exist? box and then the 1 meter and 1/9th arc-second boxes (see screenshot below).
These are the DEM datasets that have been derived from lidar data.
To download the 1 meter-resolution Carson River dataset used in this tutorial, zoom into the area circled in purple below.
Alternatively, you can download lidar DEMs from a river of your choice.
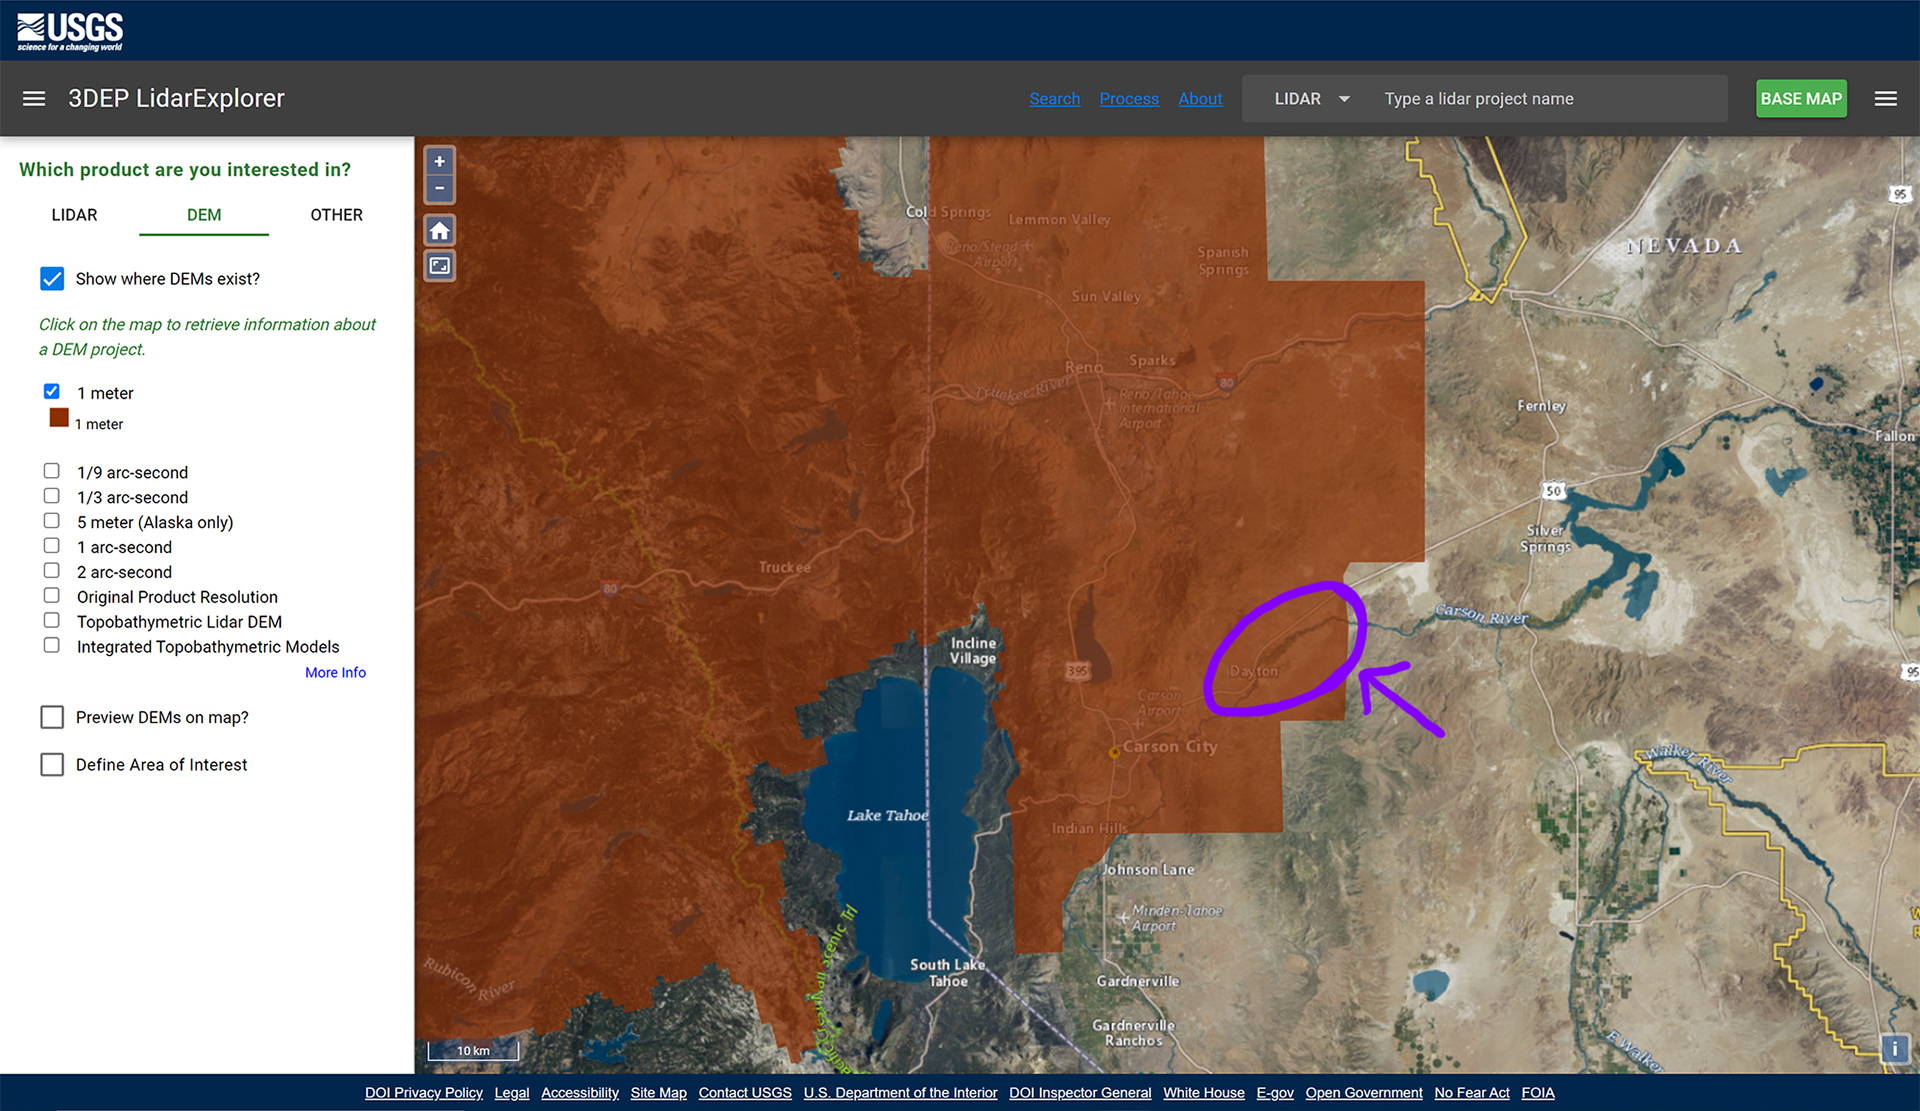
B. Continue to zoom in to the Carson River study area, which is northeast of Carson City and Dayton, Nevada.
To switch to the imagery basemap shown below select the green BASE MAP button at upper right of the screen and select USGS Imagery Topo basemap.
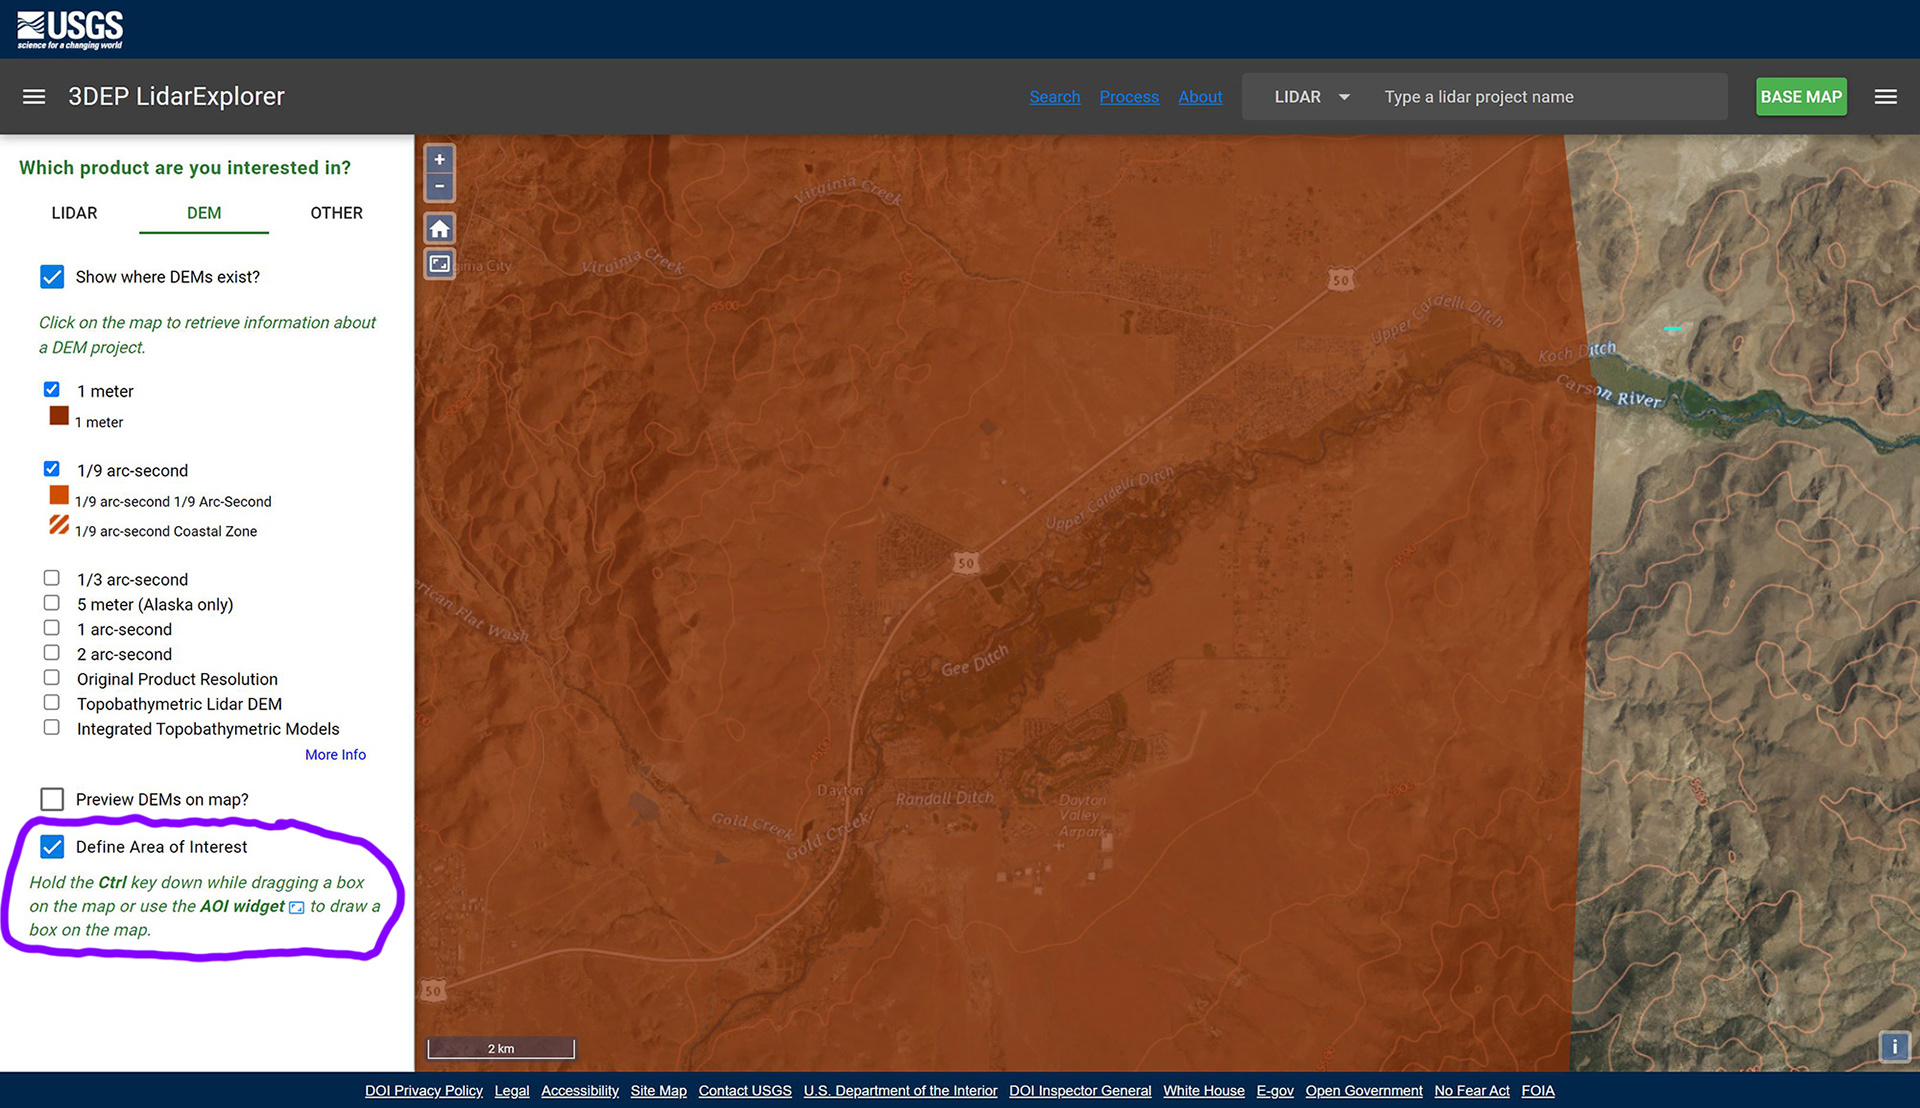
C. Once you have zoomed all the way in to the study area, check the Define Area of Interest box at the bottom left side of the screen (see below), hold down the control key, click and drag a box over the study area.
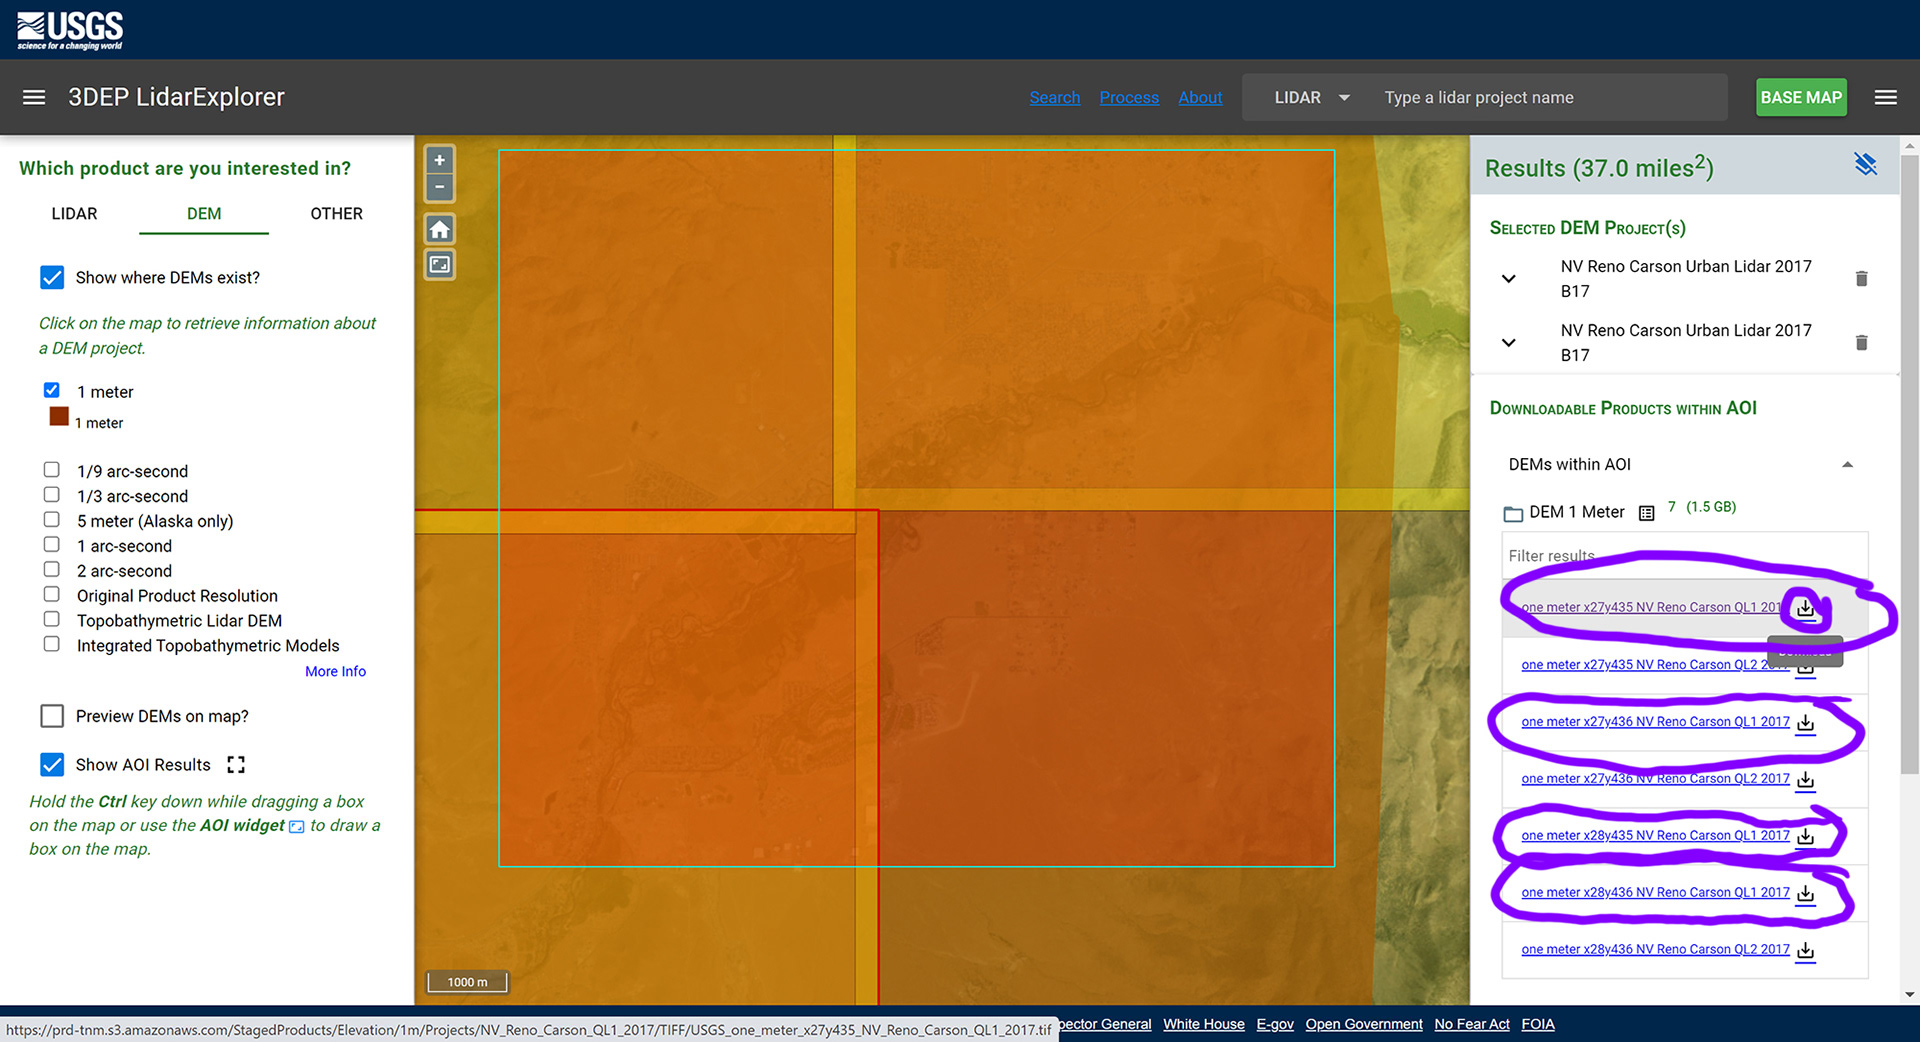
D. Once you have selected the study area a Downloadable Products within AOI sidebar will appear on the right.
Select the DEMs with AOI dropdown arrow.
For this area of interest select DEM 1 meter (see below)

E. For this study area, download all of the datasets that have QL1 in the filename using the download icon next to each dataset (see below).
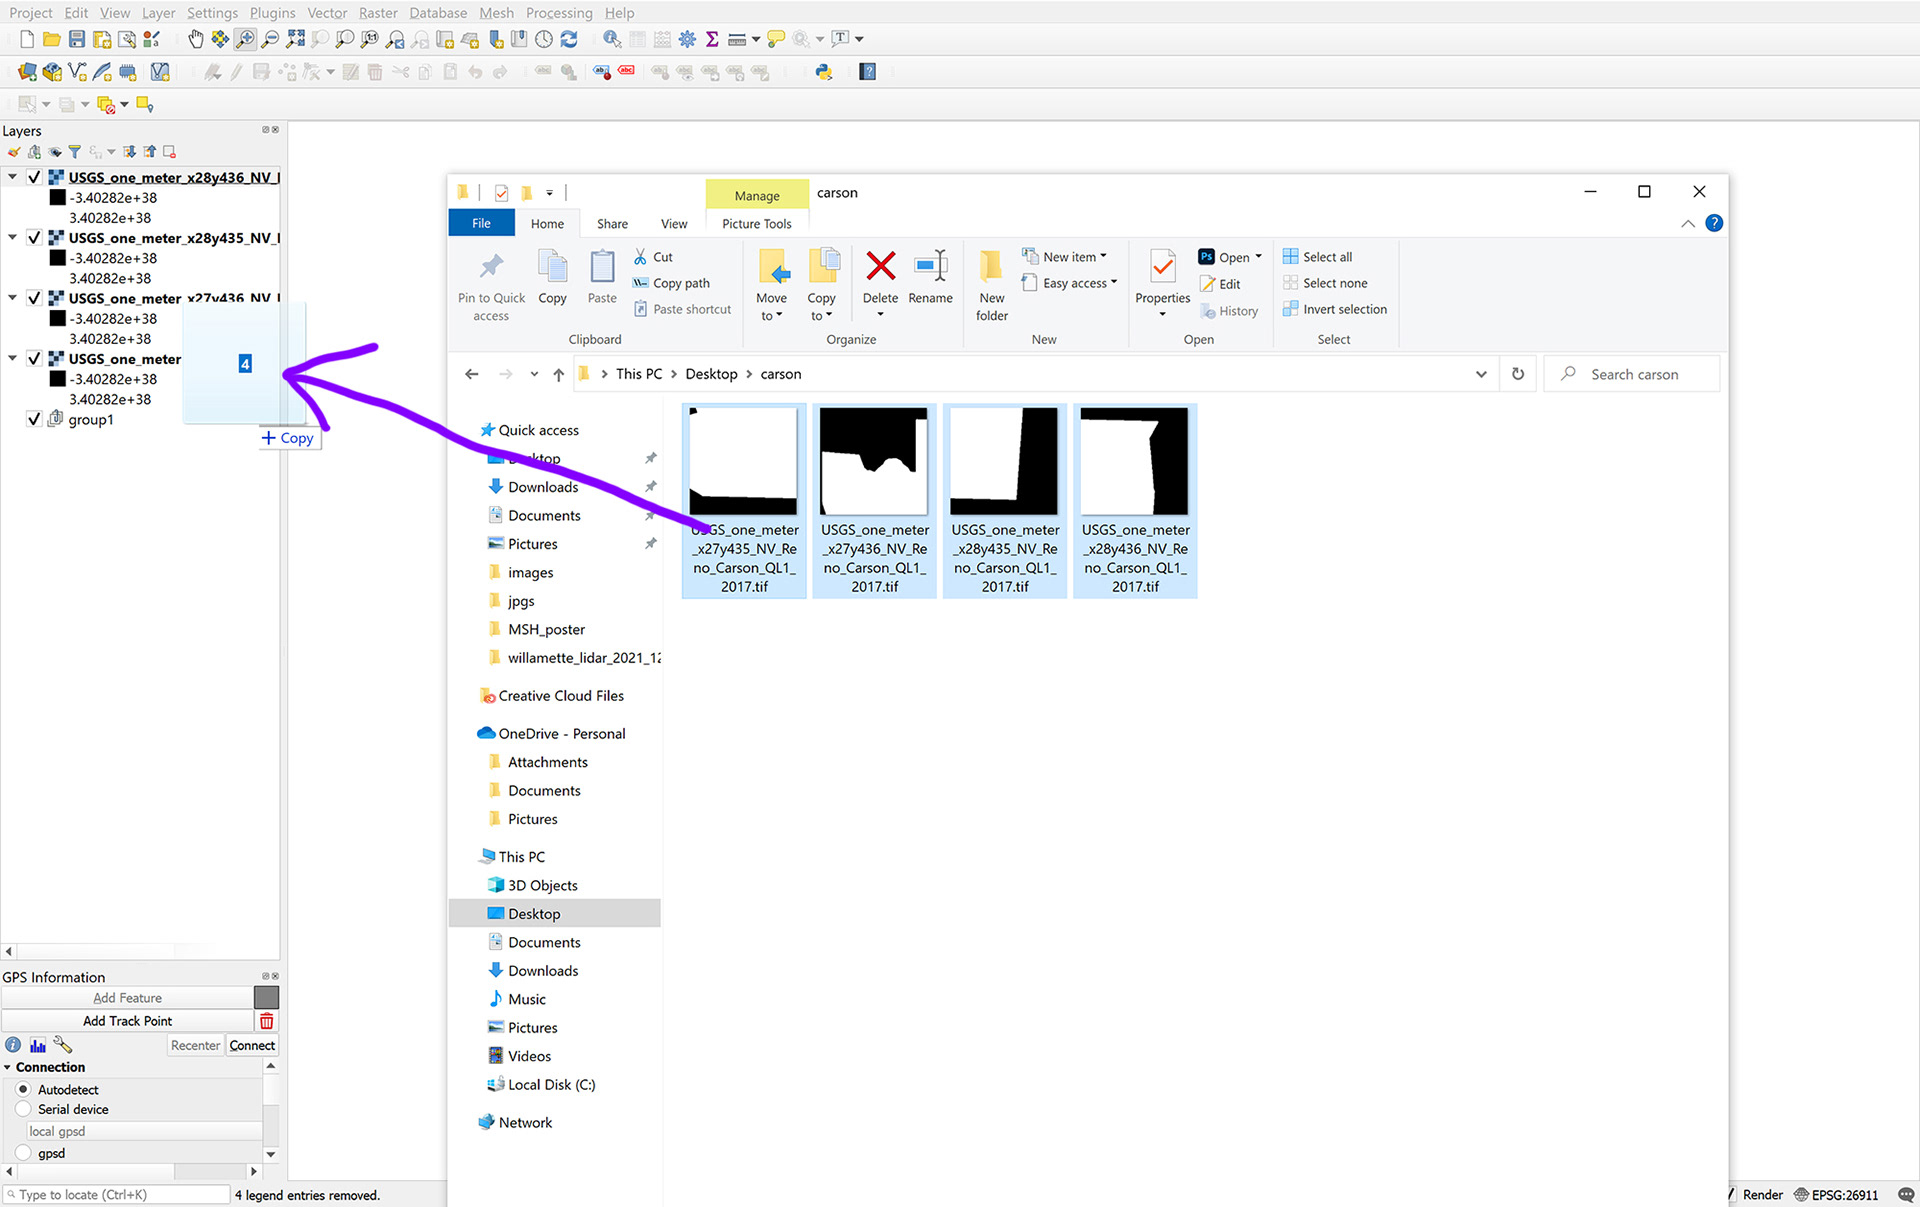
F. Move the DEMs to your project folder.
Open QGIS.
For this tutorial I used QGIS 3.16 Hannover Long Term Release, but the steps should be the same for all recent releases.
Once QGIS is open, drag the DEM files (in this case, 4 .tifs) into the Layers window, or load them with the Data Source Manager.
If you get a Select Transformation window when you add the data, select ok
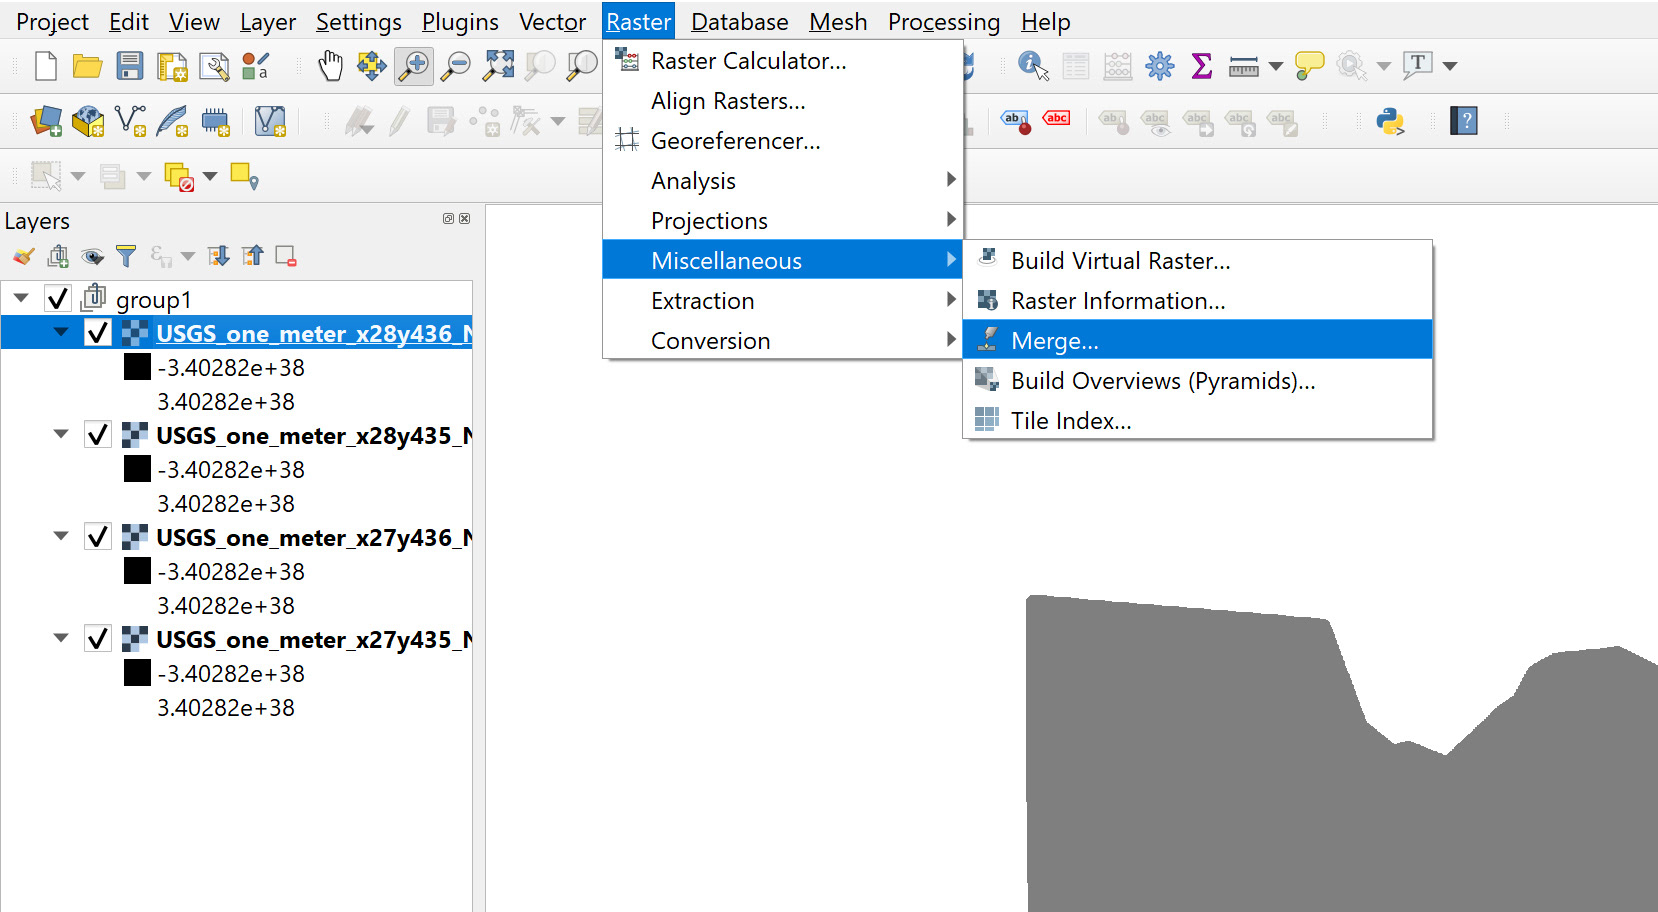
G. To make an REM you need a single DEM raster to start the process.
If you have multiple DEM files you can use the merge tool to combine them into one raster file.
Go to Raster>Miscellaneous>Merge to open the tool (see below).
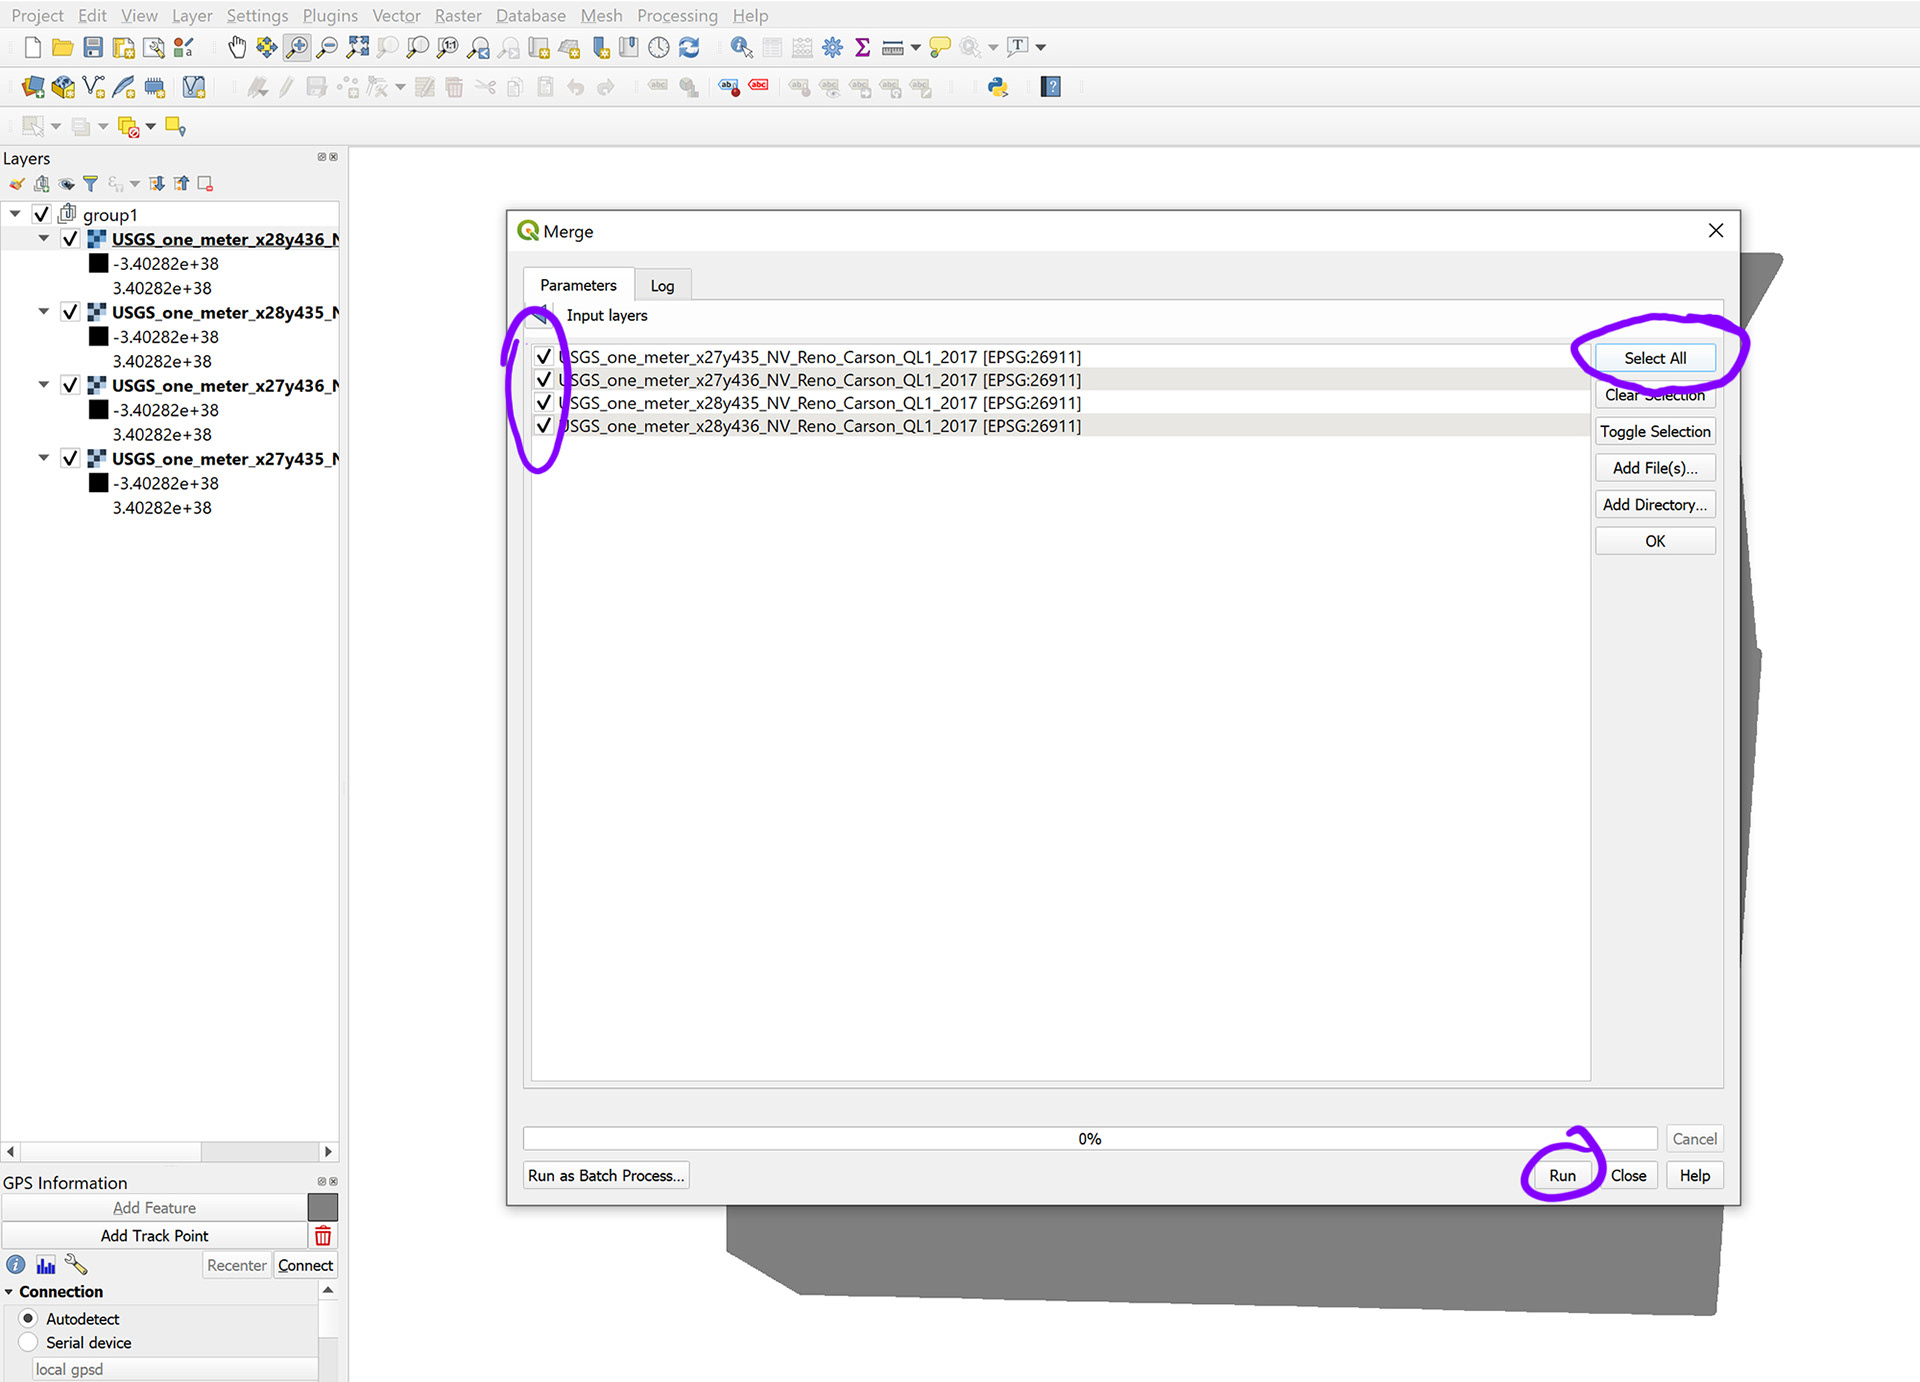
H. In the Merge window select the files that you want to combine.
You can use the Select All button to check all of your files at once.
After selecting your files, click the Run button.
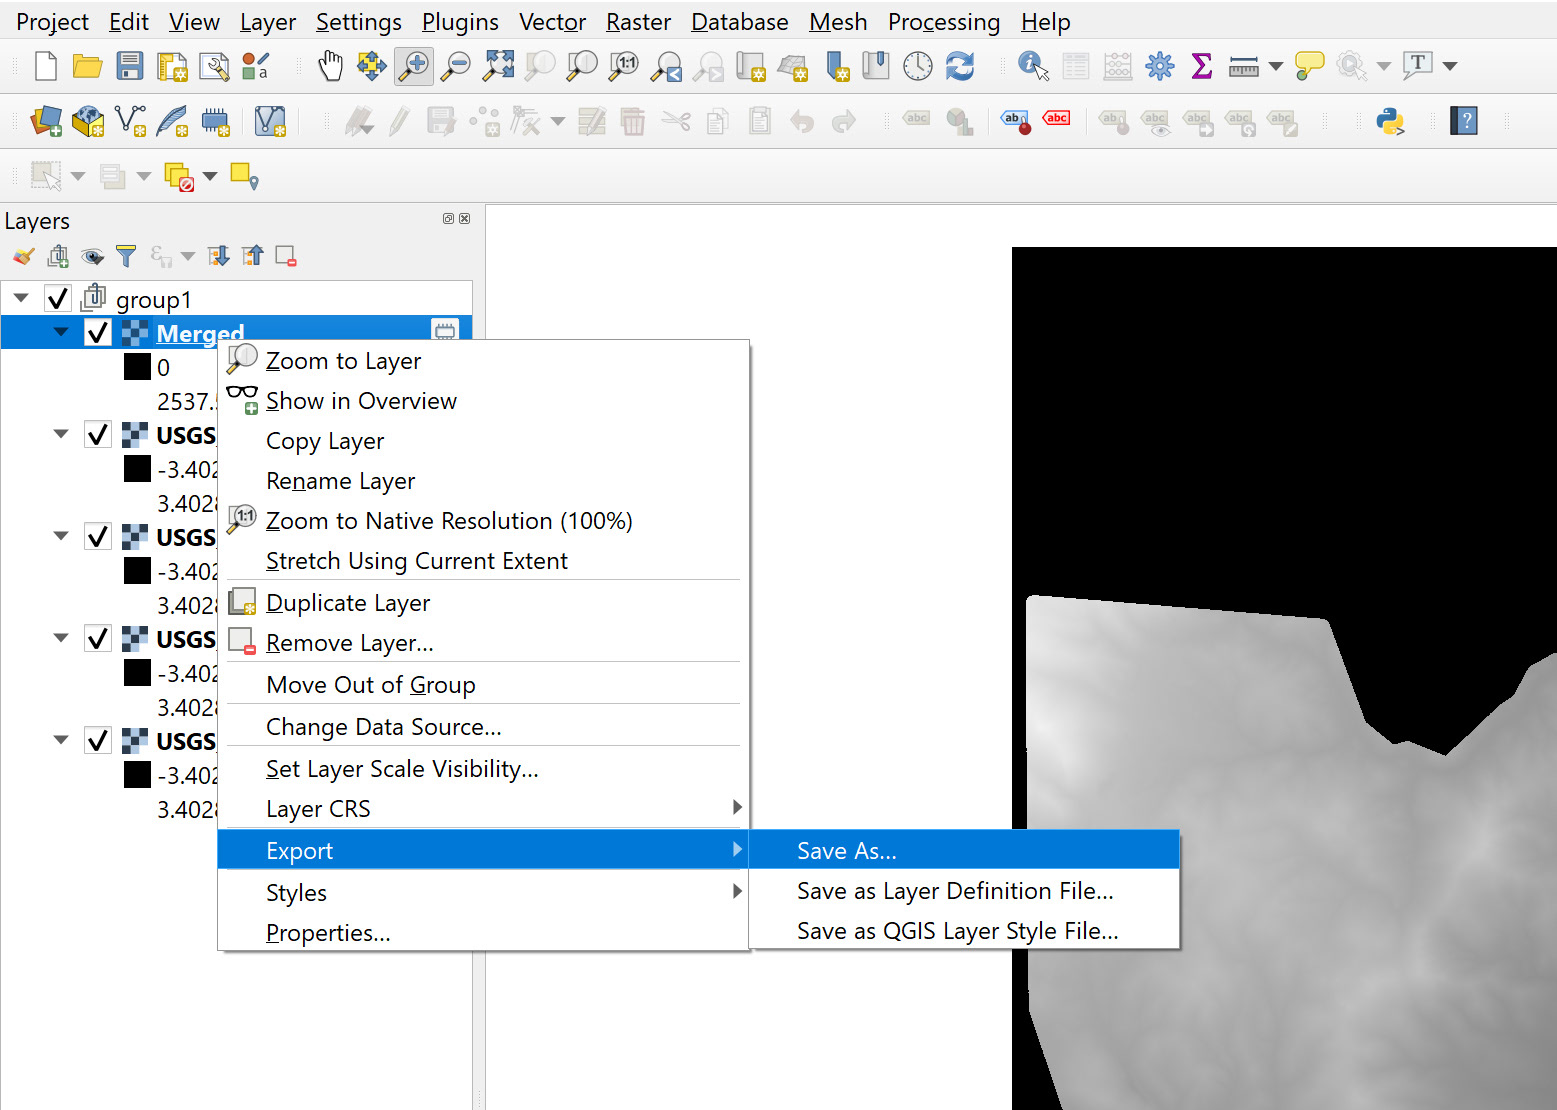
I. When the process has completed a temporary Merged raster will be added to the Layers window.
Right click (control-click on a Mac) on the Merged raster and and select Export>Save As (see below).
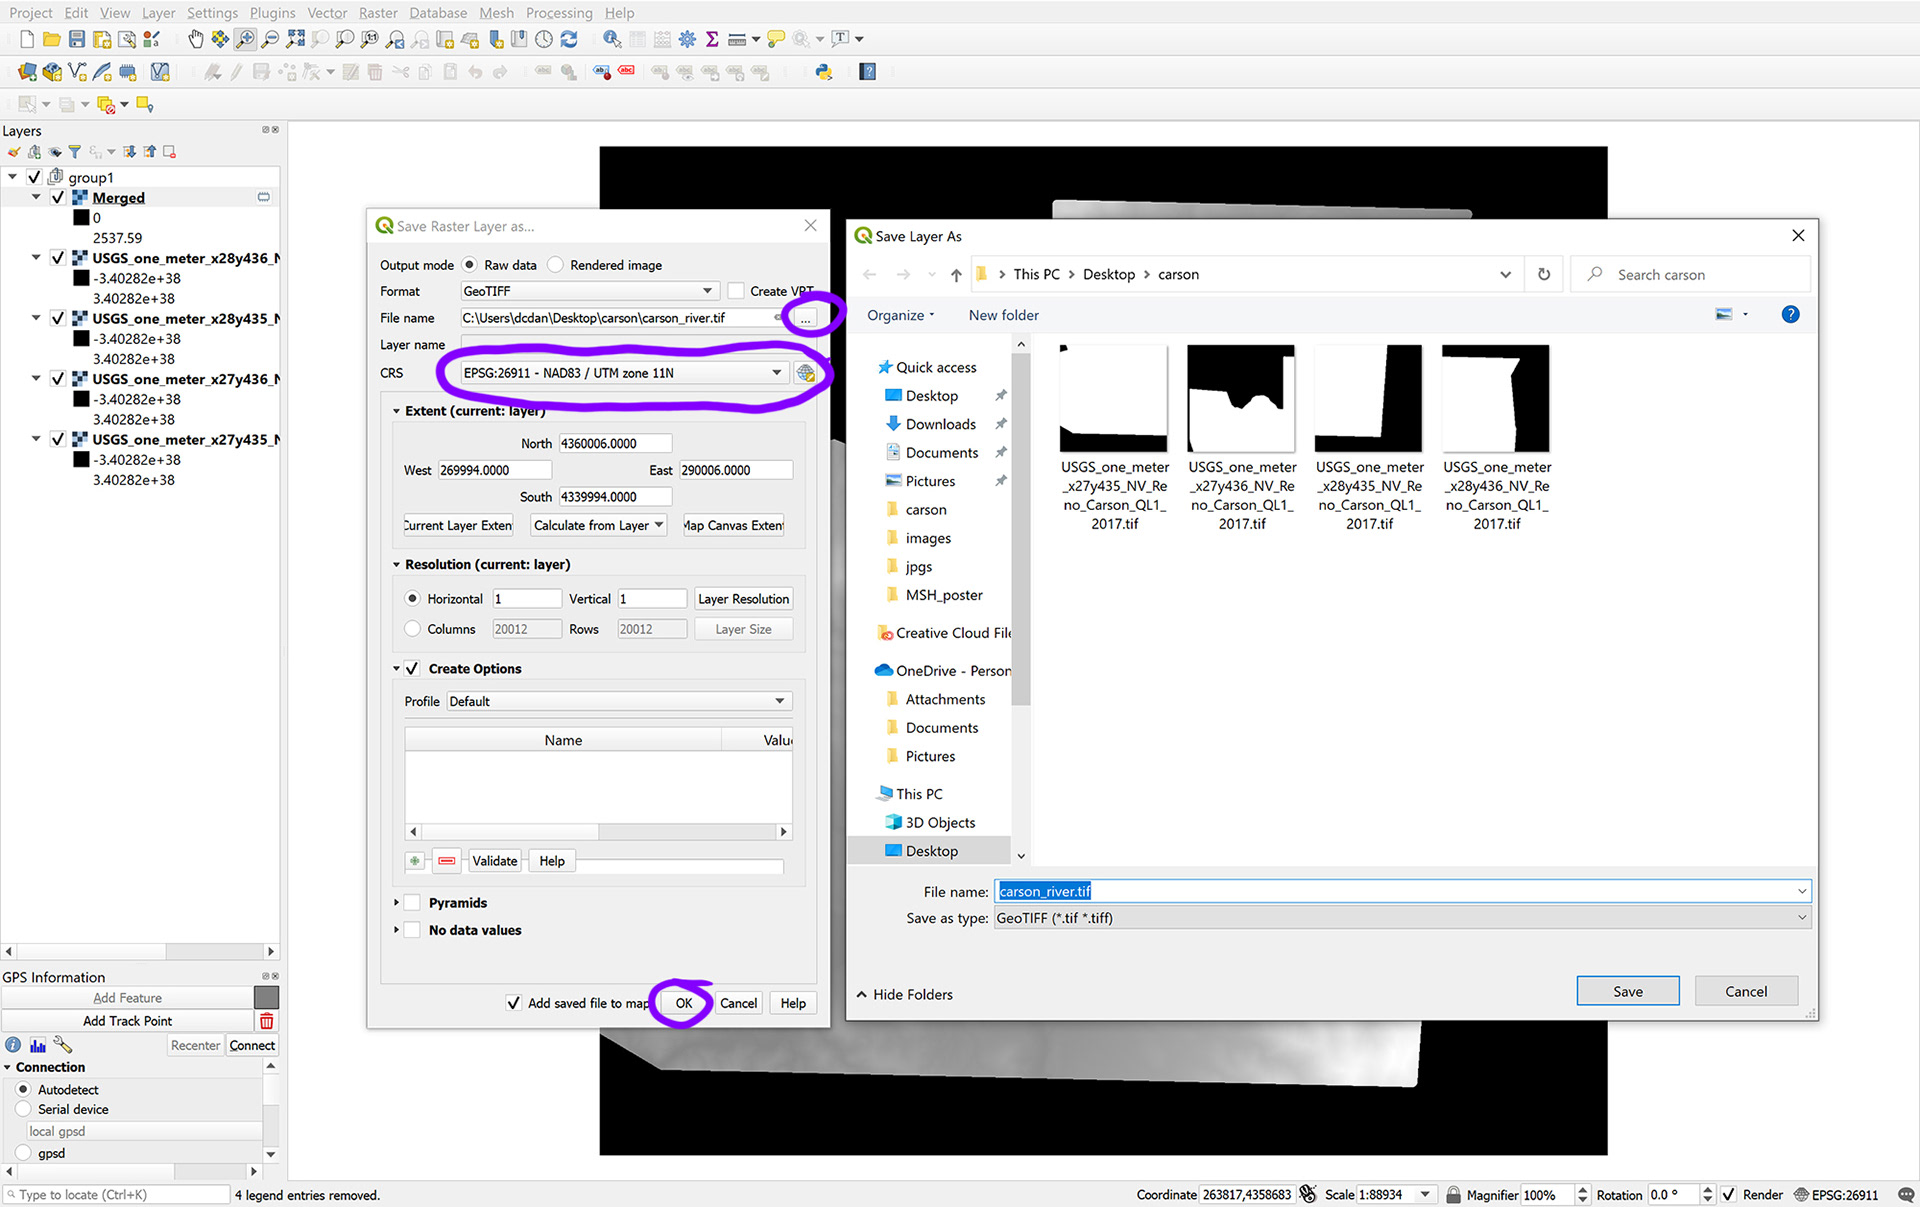
J. In the Save Raster Layer as window select GeoTiff for Format, then select the 3 dot (...) button to the right of File name to designate the location and name of your file.
Check that the CRS is the same as your original DEM files (in this case, EPSG:26911 NAD83/UTM Zone 11n).
You can find the file CRS under Layer Properties>Source.
Additionally, you can also find and change the Project CRS under Project>Properties>CRS.
Select OK to export the file.
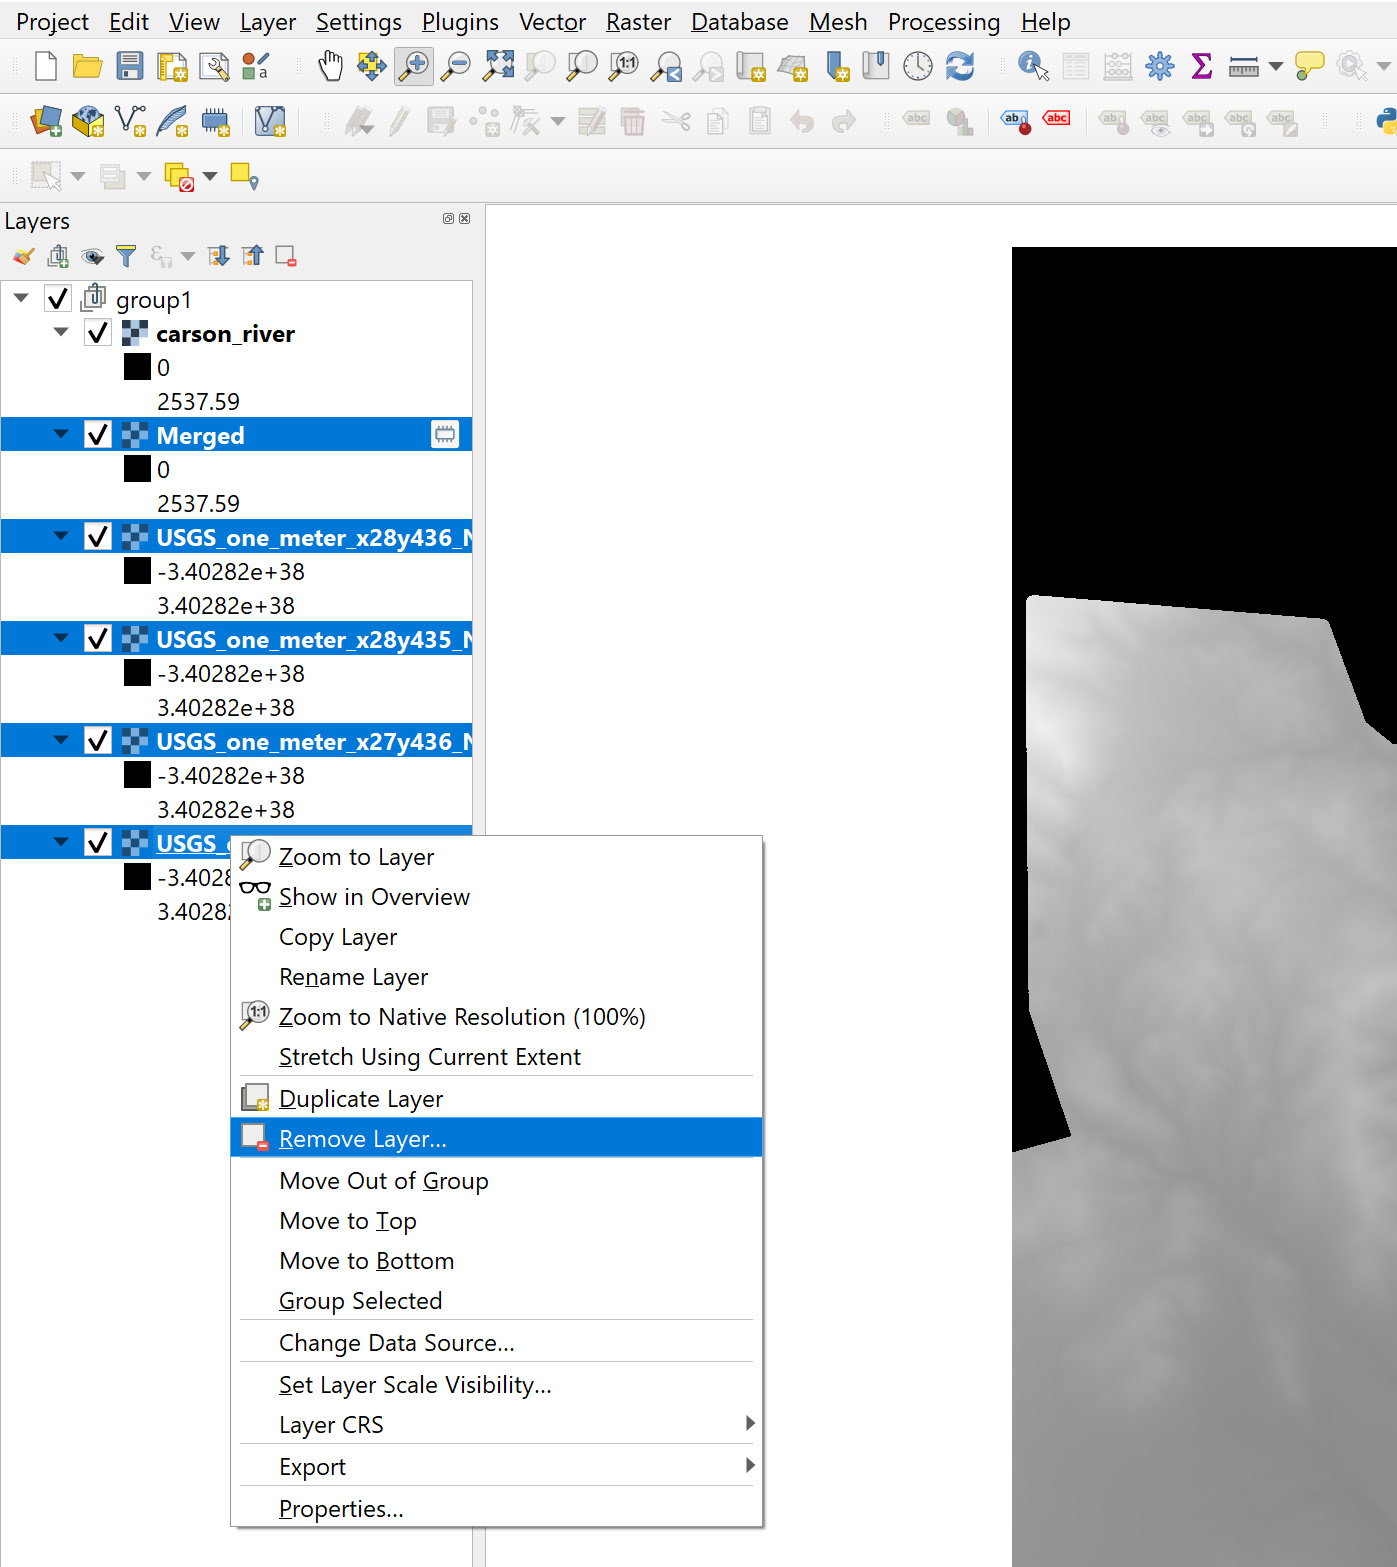
K. Once the merged file has been created and added to your Layers window, remove the original DEM rasters and the temporary Merged DEM from the Layers window (see below).
Once you have your merged DEM you can start the Creating REMs in QGIS Using the IDW Method tutorial.