This tutorial shows how to set up and export images from Print Layout view in QGIS. It is meant as a follow-up tutorial to both the IDW and Cross-Section REM tutorials.

Setting Up and Exporting Your Image
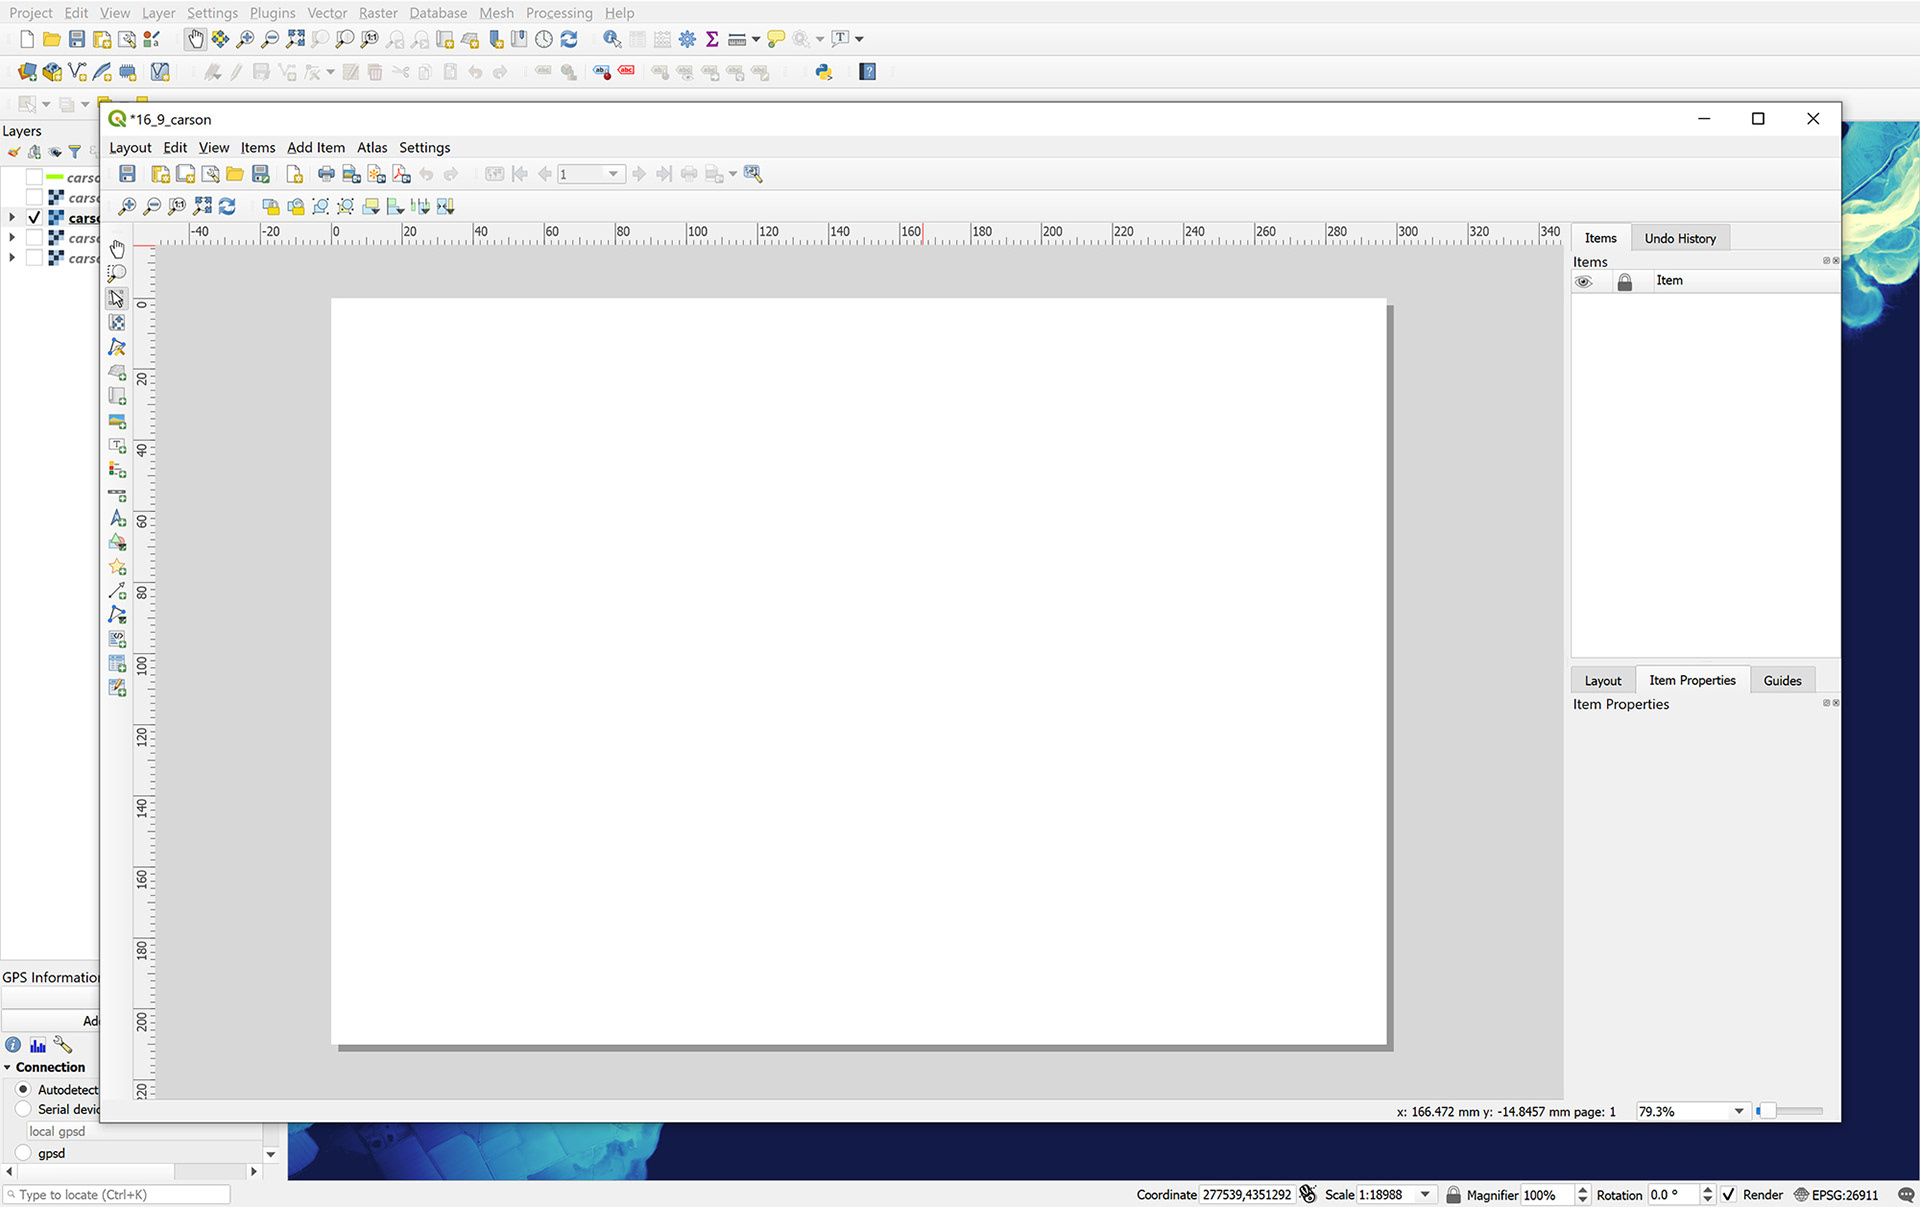
A. If you want to export a static image for web or print you can use the Print Layout function in QGIS. First make sure you only have the data that you want to appear in your image turned on in your Layers panel. Then go to Project>New Print Layout (see below).

B. You will be prompted to name your layout and then a blank layout window will appear as shown below.
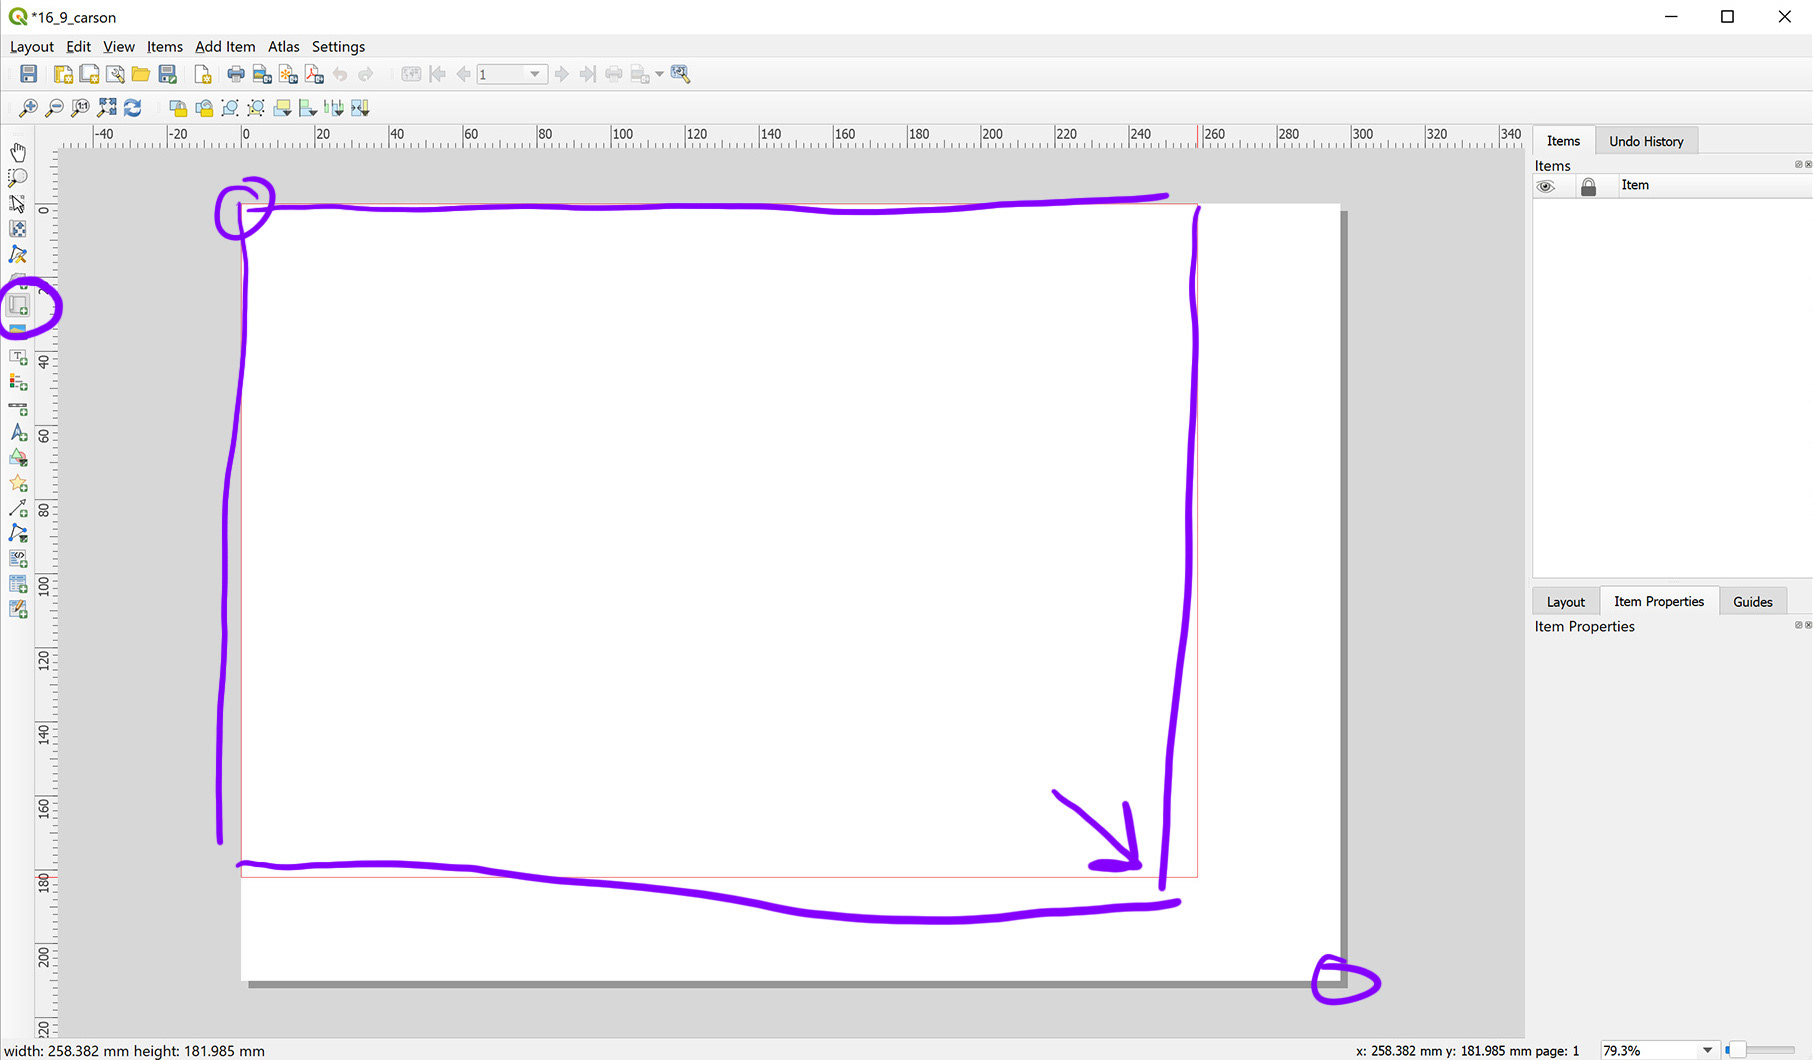
C. Select the Add Map button (shown circled below at left). Click and drag a box from corner to corner in the layout frame.
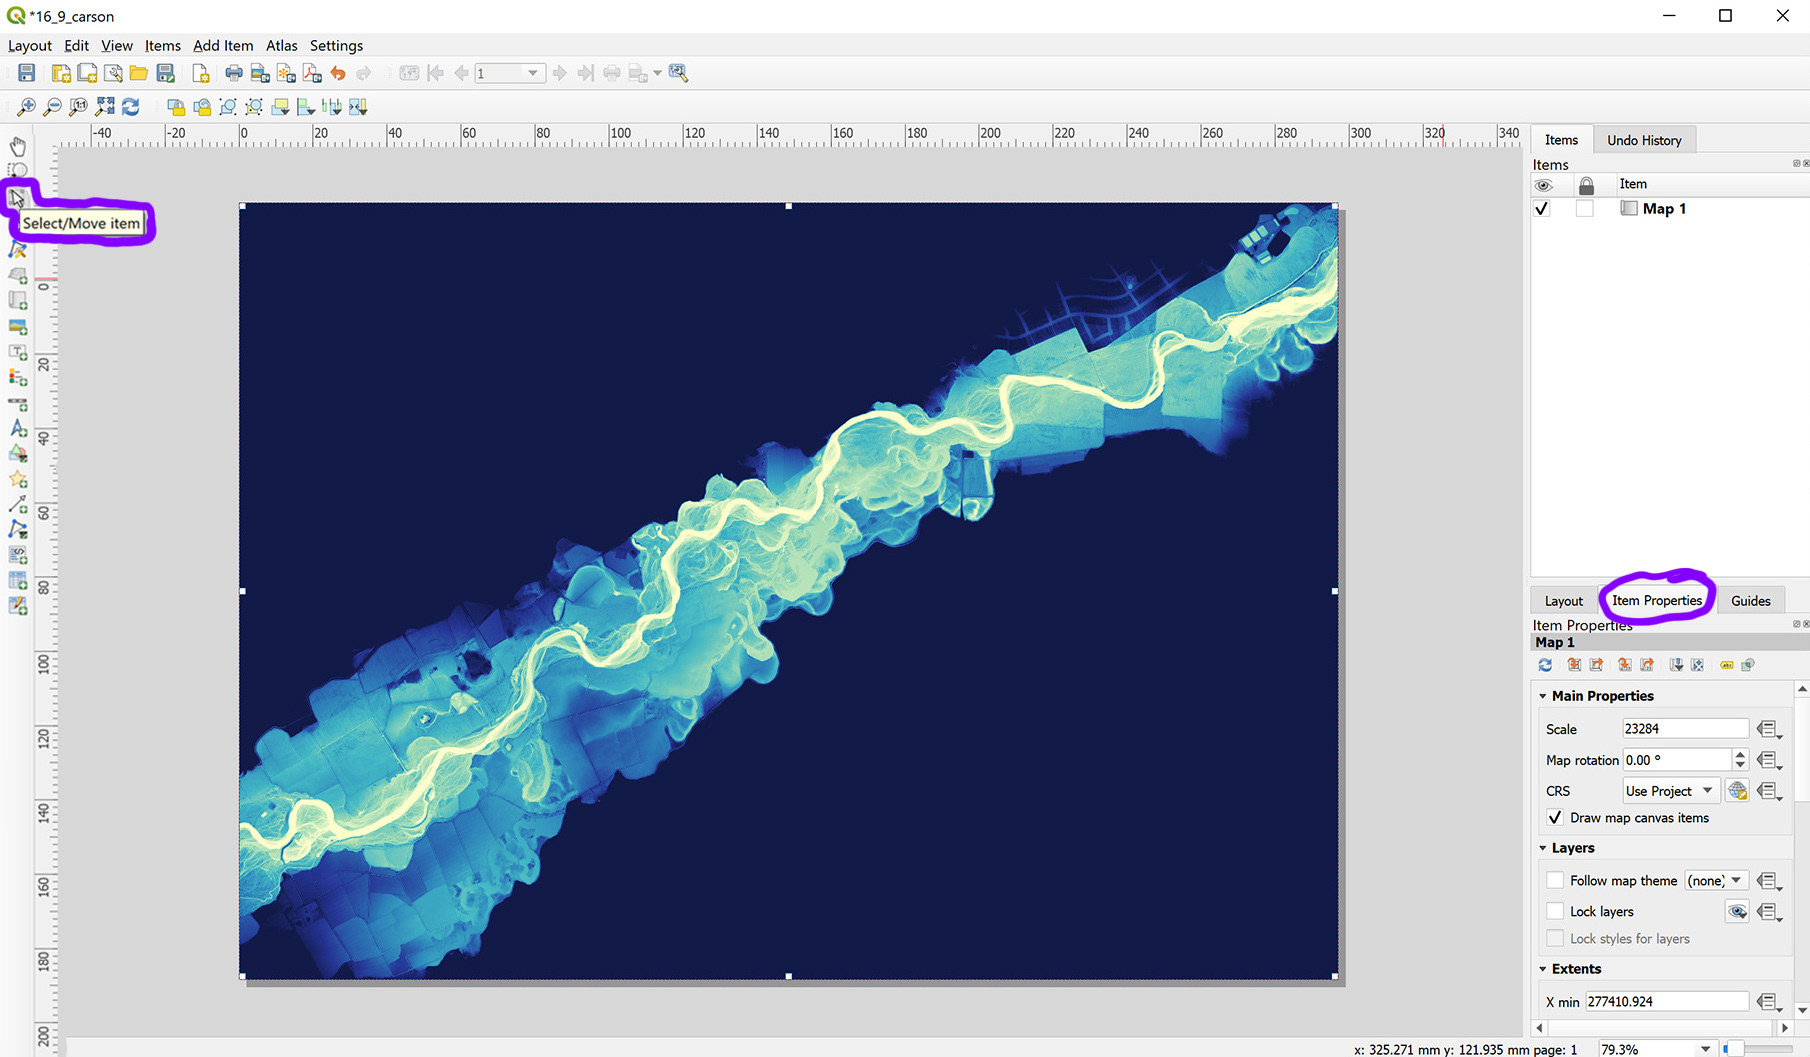
D. The visible data from your project will appear centered in the layout frame, in this case, the example REM image. Find the Item Properties tab in the window at right.
If nothing is visible under the Item Properties tab, select the Select/Move item button (circled below at left) and click on the layout frame to activate it (small squares will appear around the layout when it is active). It must be active to change the parameters for the upcoming steps.
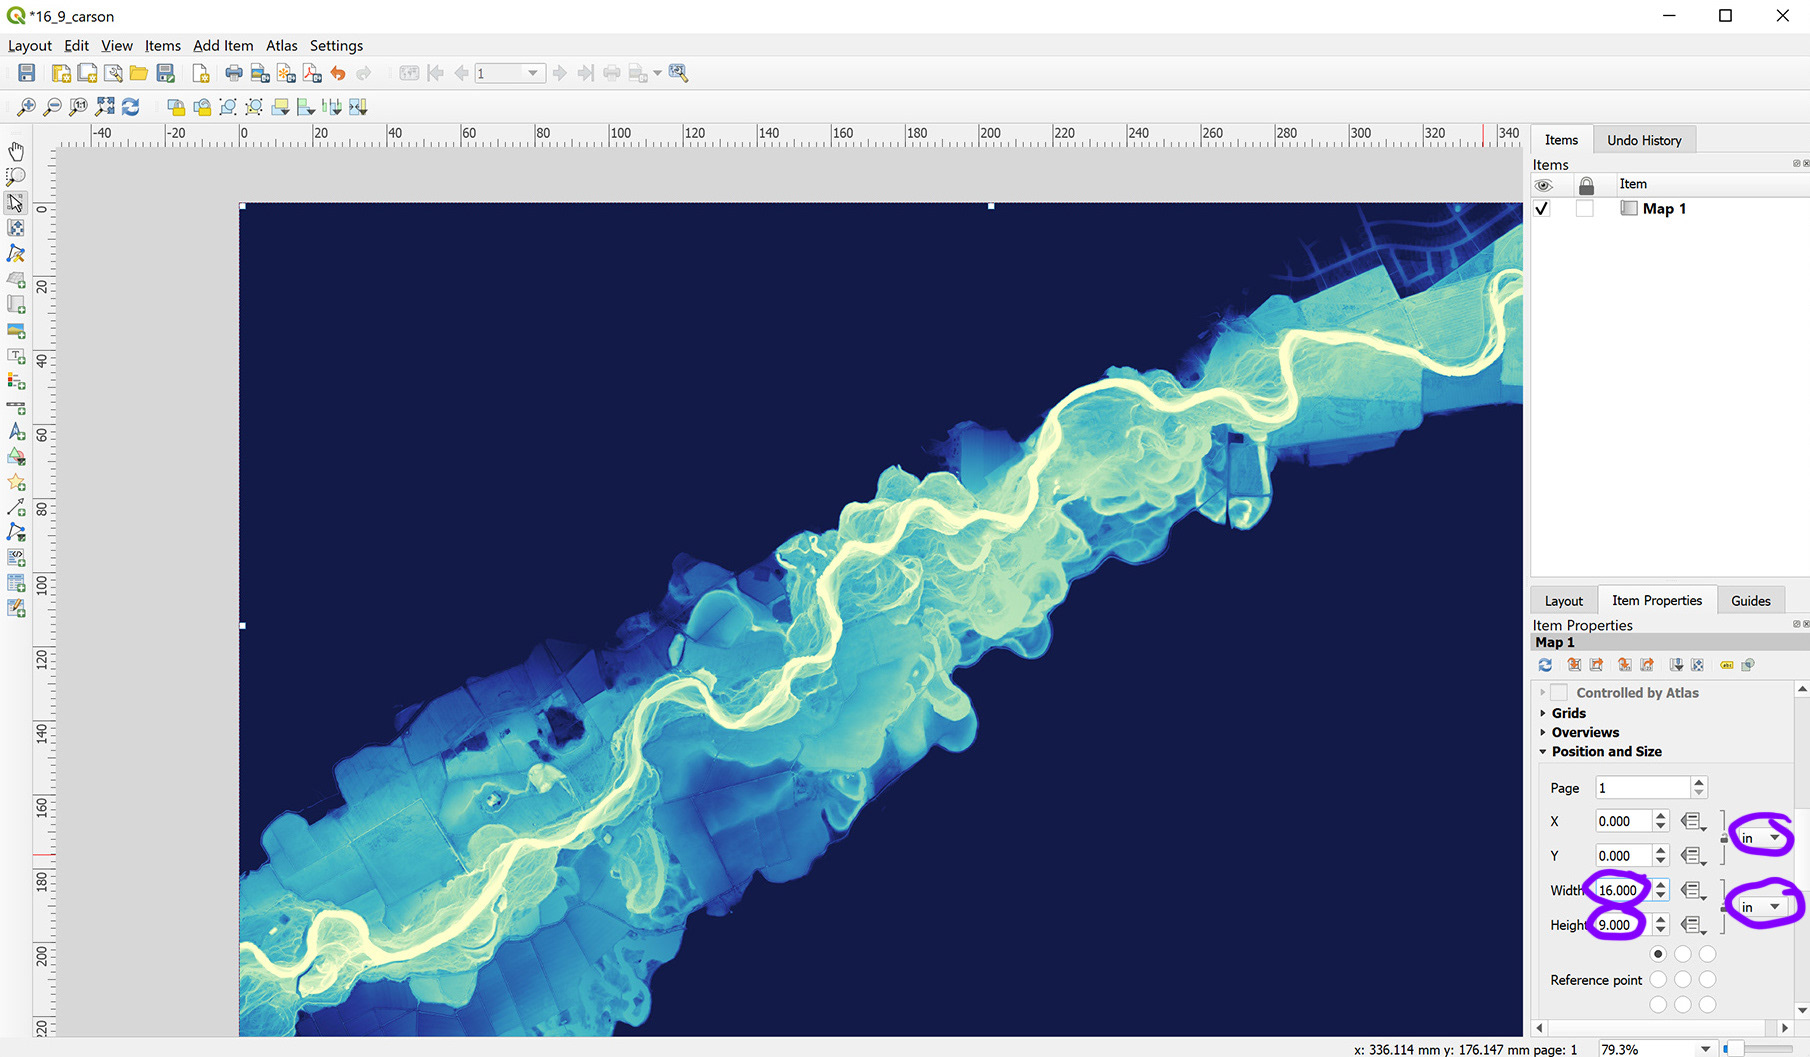
E. Scroll down in the Item Properties box to Position and Size. If you want to make a 16:9 ratio image for a video frame or screen wallpaper for example, you can set your units to pixels and make the image 1920w x 1080h or 3840w x 2160h depending on your needs and preferences. Alternately, just use your preferred units and size. In the example below it is set to a 16 x 9 inch image.
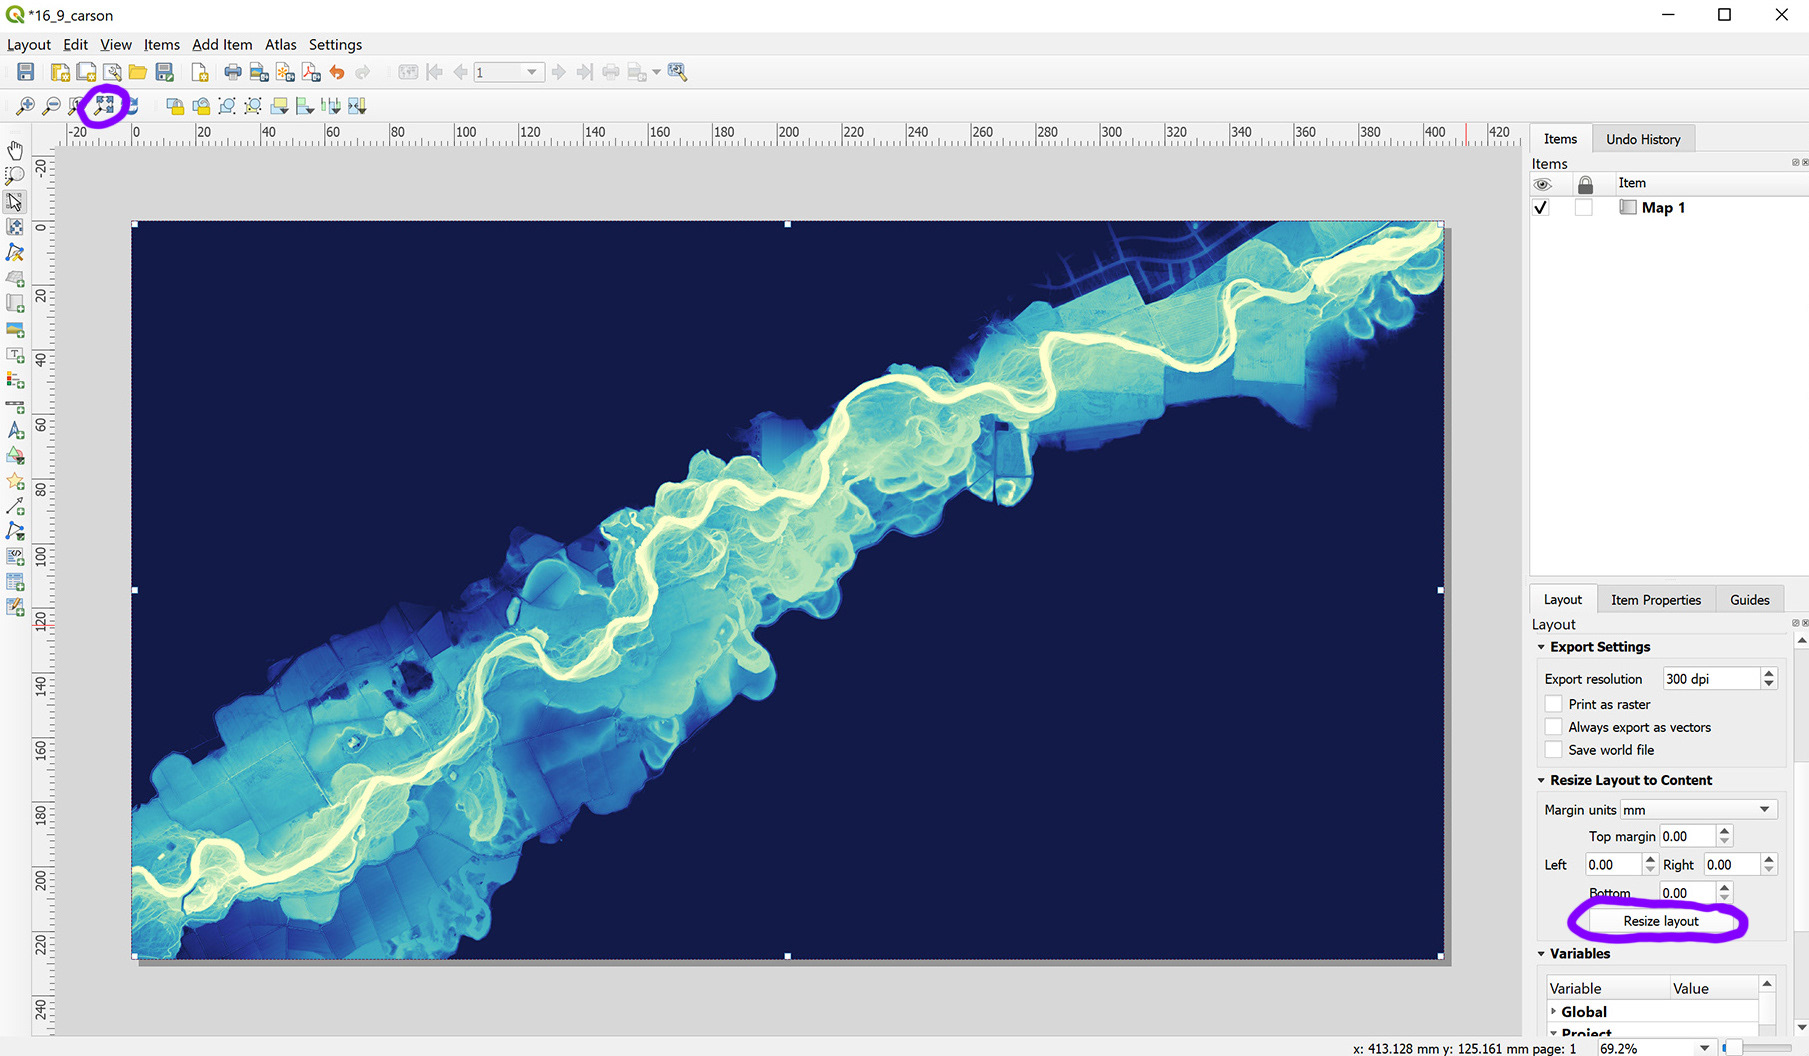
F. After setting your desired layout size, got to the Layout Tab in the window on the right (next to Item Properties) and scroll down until you see the Resize layout button and click it. Then click on the Full view button at the upper left corner of the screen (shown circled below). Your resized layout will be centered on your screen.
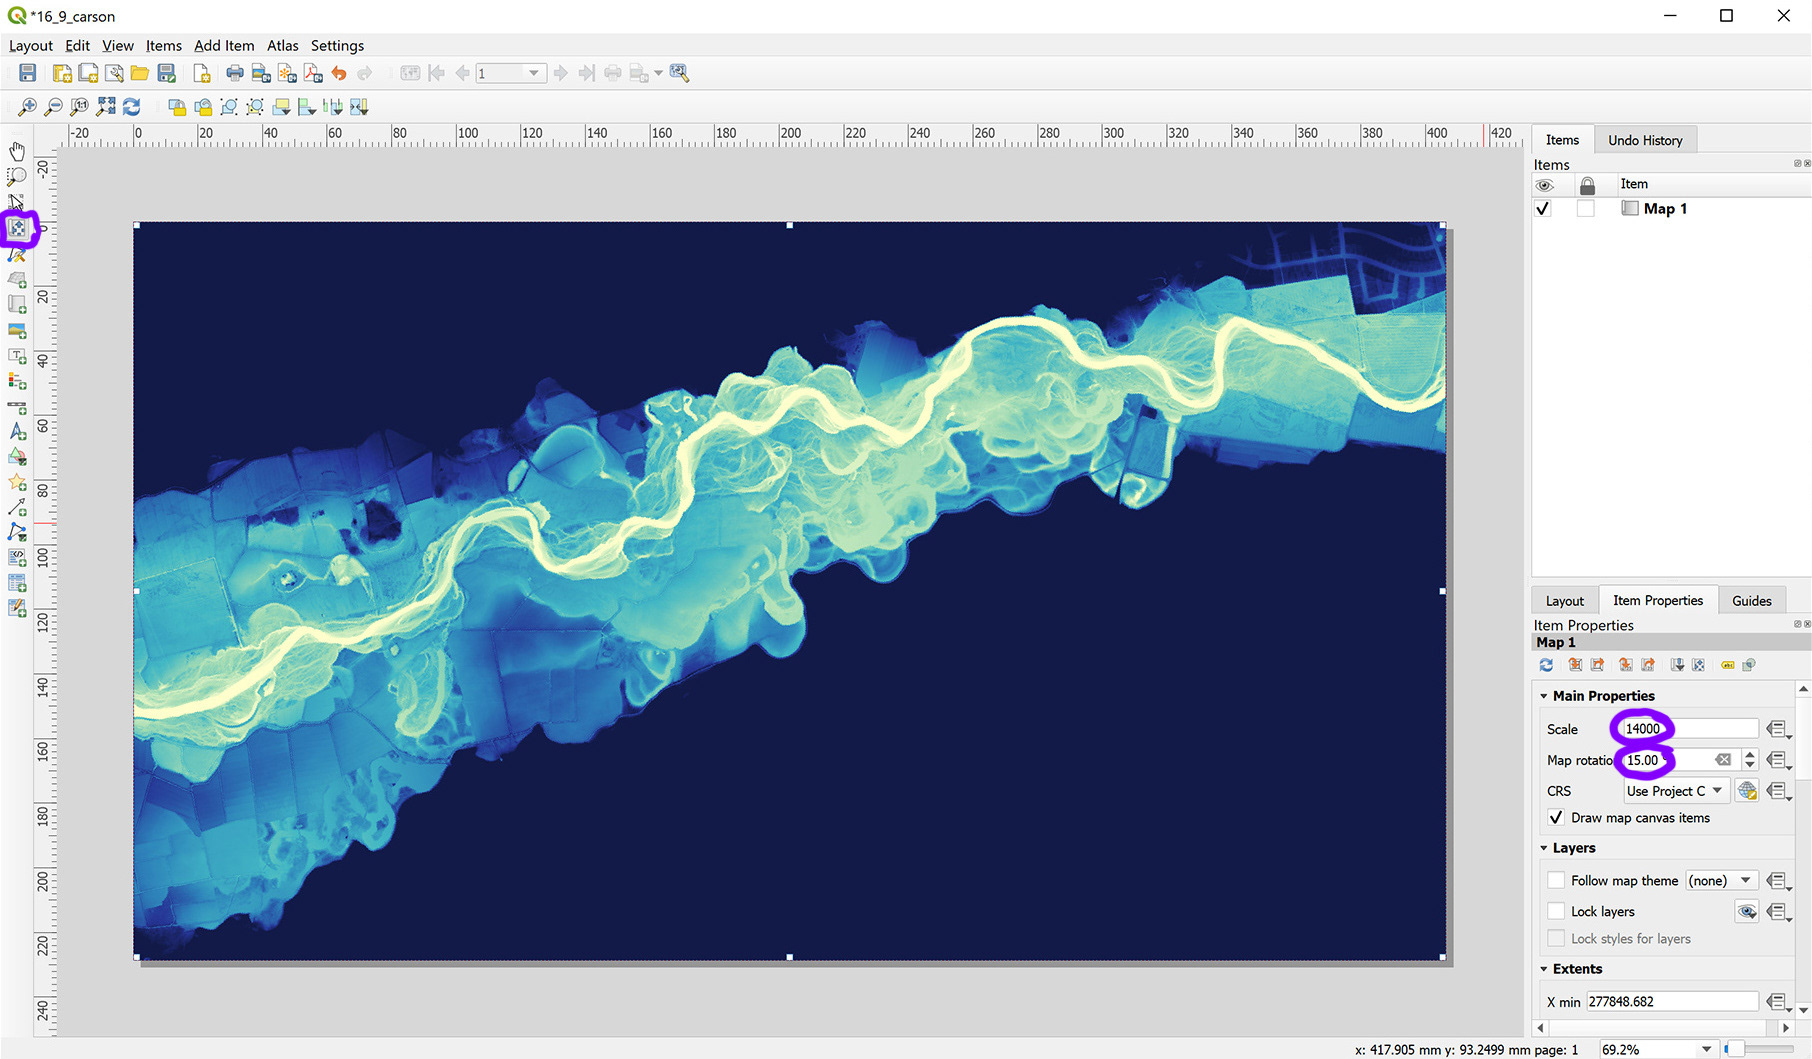
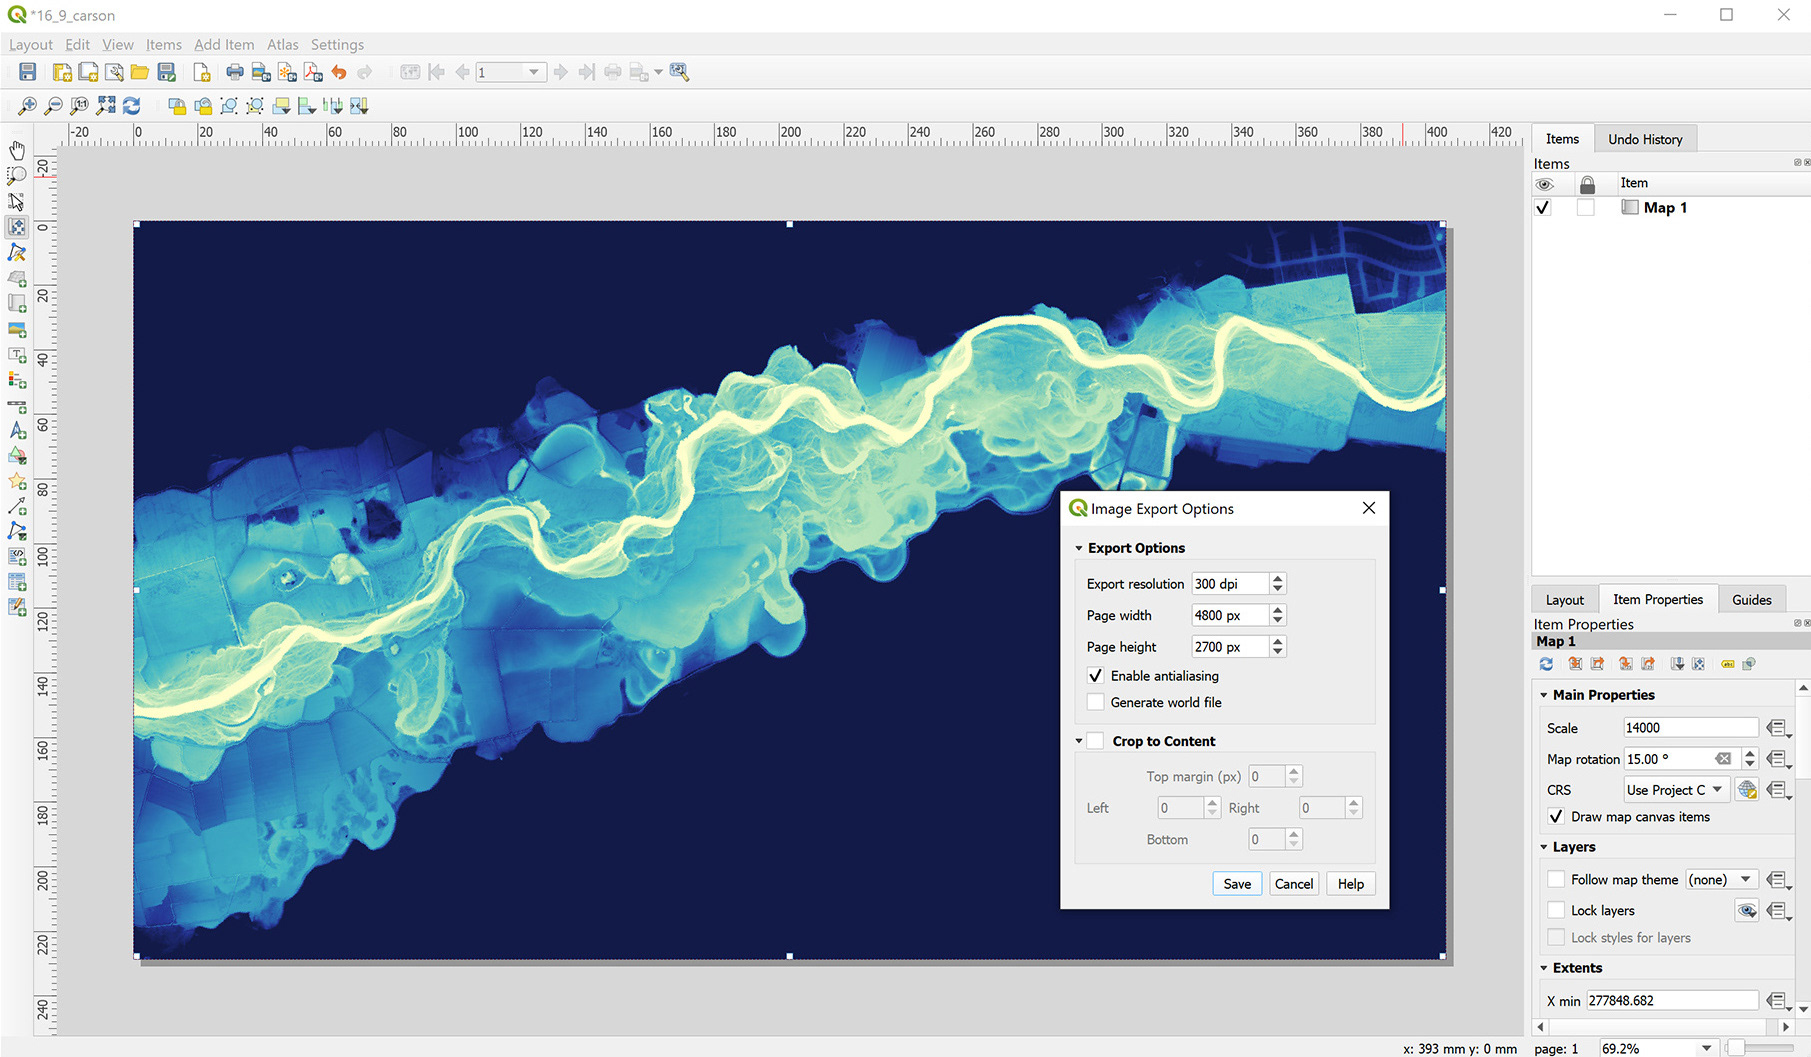
G. Go back to the Item Properties tab and adjust the Scale and Map rotation until you are happy with how the image looks. In the example below the scale was changed to 1:14,000 and was rotated 15 degrees. If you want to move the image in the layout you can select the Move item content button at left (circled below) and move the image by clicking and dragging on it.
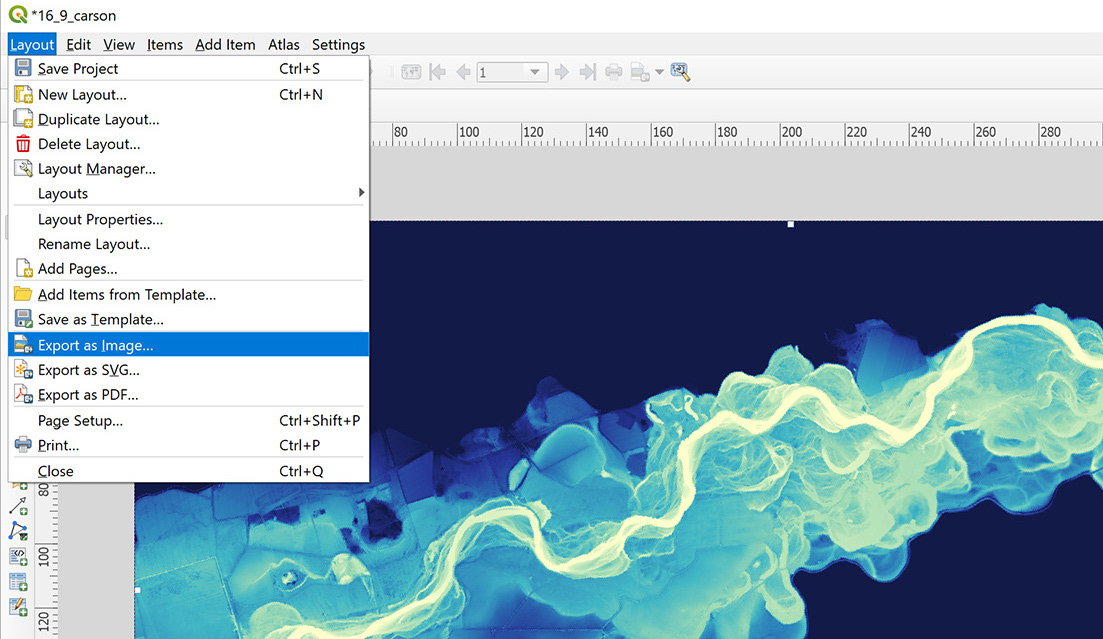
H. When you are finished adjusting your layout go to Layout>Export as Image.
I. You will be prompted to provide a file name and save location. Once that is complete, set the Export resolution if necessary in the box that appears-in this case it is set to 300dpi which will make a 4800px x 2700px image from the 16 x 9 inch layout. Then click save and you are done!
That's it! Hopefully this tutorial was useful. If you have any questions, comments, or recommendations for making this better, use the contact page to send me a message. I plan to add a video version of this and the other tutorials in the future. I will also add some how-to's for editing these types of images in Photoshop.